WooCommerce Integration
Announcement
Supported Countries#
Australia and New Zealand
Supported Products#
LatitudePay/LatitudePay+ (Australia) and Genoapay (New Zealand)
For New Zealand merchants (with NZD as default currency), please use Genoapay instead of LatitudePay for every step described on this page.
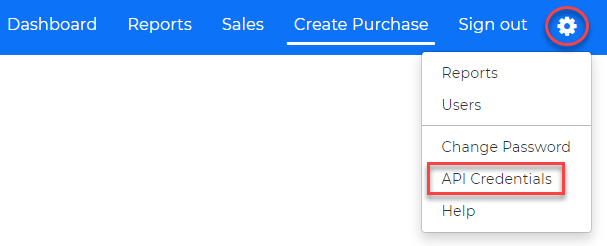
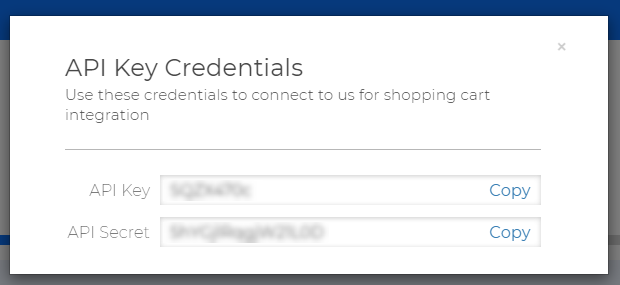
Locate Your LatitudePay Merchant API Credentials#
To integrate with LatitudePay/Genoapay, you will need to obtain the following API Credentials:
- API Key
- API Secret
These Credentials are found on the settings dropdown on your Merchant Portal:
- LatitudePay Portal - https://app.latitudepay.com/merchant/login
- Genoapay Portal - https://app.genoapay.com/merchant/login
If you have any issues locating these, please contact us at integrationsupport@latitudefinancial.com
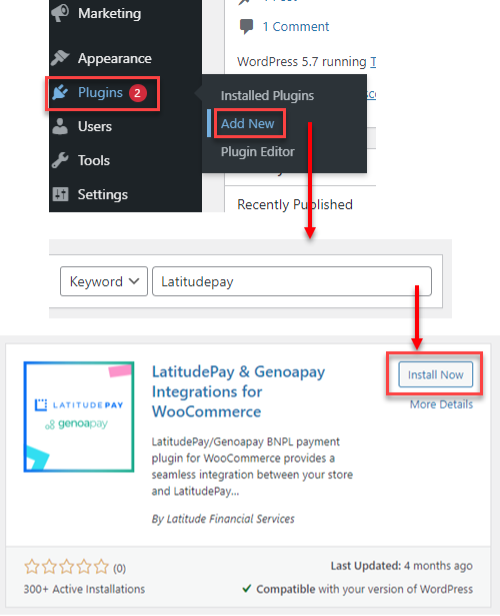
Installing WooCommerce Plugin#
The LatitudePay installation for WooCommerce plugin is now available on WordPress Marketplace. To download and install the plugin, please follow the steps below.
- Proceed to Plugins > Add New
- On the Add Plugins page, click search for LatitudePay via the search box on the top right.
- Select install now.
- Select activate if it is not already activated.
- Once it is activated you will see the plugin in the payment settings option. Proceed to: WooCommerce > Settings > Payments and select ‘manage’
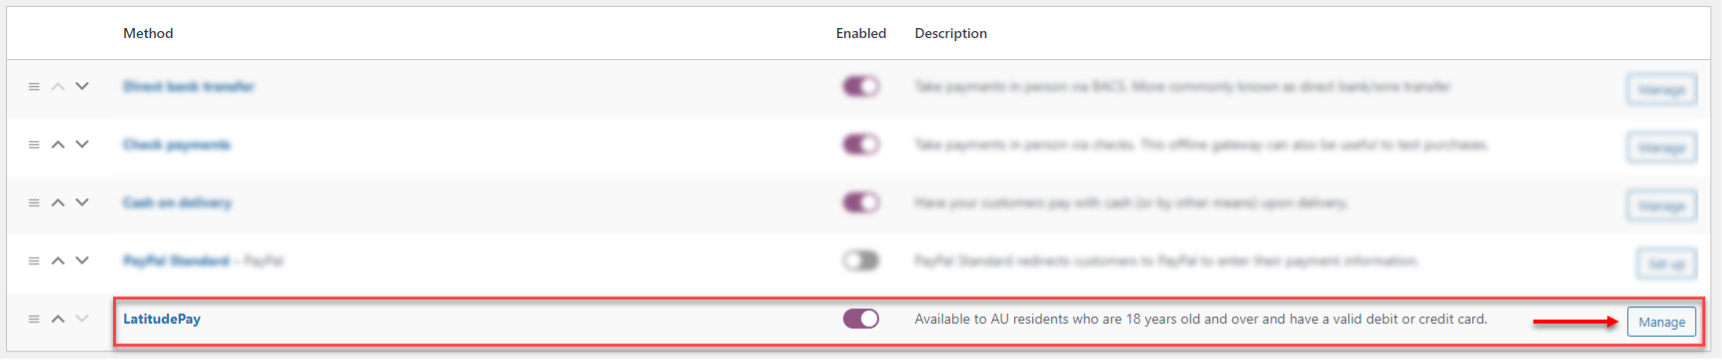
- After you have clicked the above payment type you will see the main configuration screen. This is where you will complete the configuration.
| Field | Default | Description |
|---|---|---|
| Enabled | No | Make sure Enable/Disable is ticked as enable |
| Show Payment Icon in Mobile | No | Set Yes to display the icon in mobile |
| Environment | Production | Select either Sandbox to test the plugin or Production when you are ready to |
| Client Key | The Client key can be obtained from LatitudePay GP merchant portal. Please refer to “Locate your LatitudePay Merchant API Credentials” | |
| Client Secret | The Client Secret can be obtained from LatitudePay GP merchant portal. Please refer to “Locate your LatitudePay Merchant API Credentials” | |
| Minimum Order Total | Minimum field will be automatically populated and set to $20 after you have entered the API key and Secret and save. | |
| Debug | off | Leave option as |
LatitudePay+ & Co-Presentment#
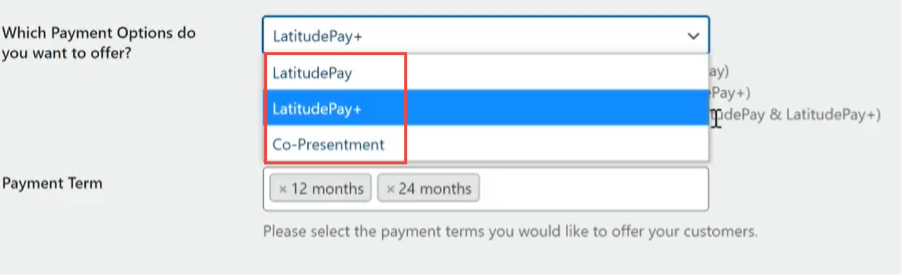
Approved merchants will have the option to offer their customers with either LatitudePay+ or our Co-Presentment Product offering in the admin panel. Co-Presentment will enable merchants to offer both LatitudePay for transactions below $1000 and LatitudePay+ will also be able to be offered on products above a minimum threshold.
To enable LatitudePay+ or Co-Presentment, you can select the following option by repeating Step 5 in the previous section and selecting Manage your LatitudePay Payment option by Proceeding to: WooCommerce > Settings > Payments and select ‘manage’
- Once in the Payments section, ensure to scroll down below to “Which Payment Options do you want to offer?” and select the option based on the terms stipulated on your Merchant Contract.
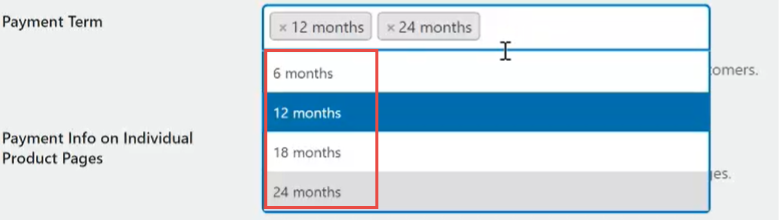
- Once the Payment option is selected, you will be able to Select the Payment Terms you want to offer for your customers. Please note. you can offer 4 different payment terms, 6,12,18 or 24 months. Please speak to your account manager and refer to your Merchant Contract to view which terms you have been approved to offer your customers. Please note at least one payment term will need to be selected but multiple options can be selected based on your contract.
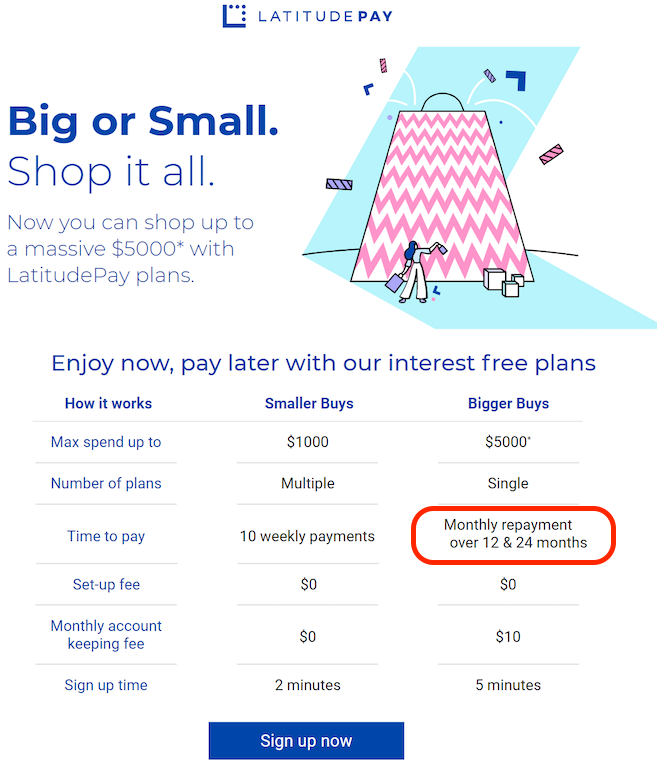
- Please note that the payment terms selected will reflect on your PDP Modal and clearly will let visitors of your site know the number of months they are able to pay their transaction over. E.g If 6 & 12 months are selected in the Payment Terms section, the following information will be displayed if the LatitudePay+ option is offered.
Remove/Uninstall WooCommerce Plugin#
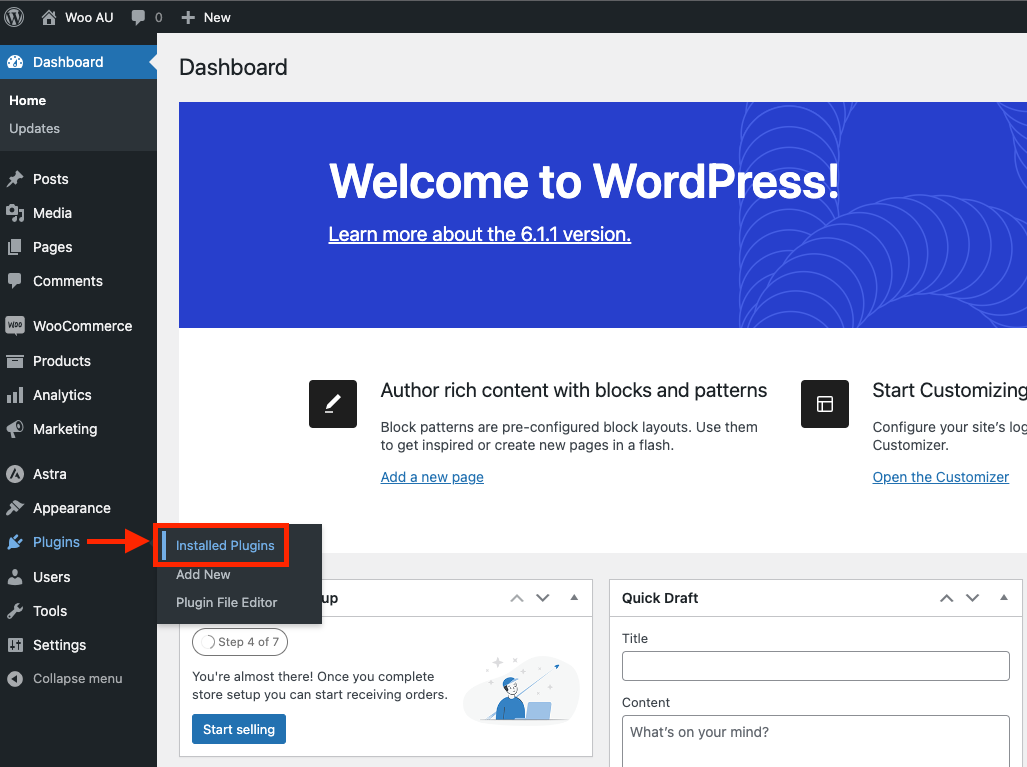
- Navigate to your WooCommerce Dashboard and select Plugins -> Installed Plugins in the bottom left. This will take you to the Plugins setting page for all the current installed plugins you have on the site.
- On this page you can filter the list by typing in LatitudePay in the search bar, and you should only see our WooCommerce plugin in the list. Please select the Deactivate option as shown below.

- You will get a notice at the top to show that the plugin was successfully deactivated. From there you will see that you have the option now to Delete the LatitudePay WooCommerce plugin. Proceed with selecting the Delete option and confirm the popup box that will show. Once you have confirmed, where the plugin was showing will now have a notice that the plugin was successfully deleted. Please refer to the below images.
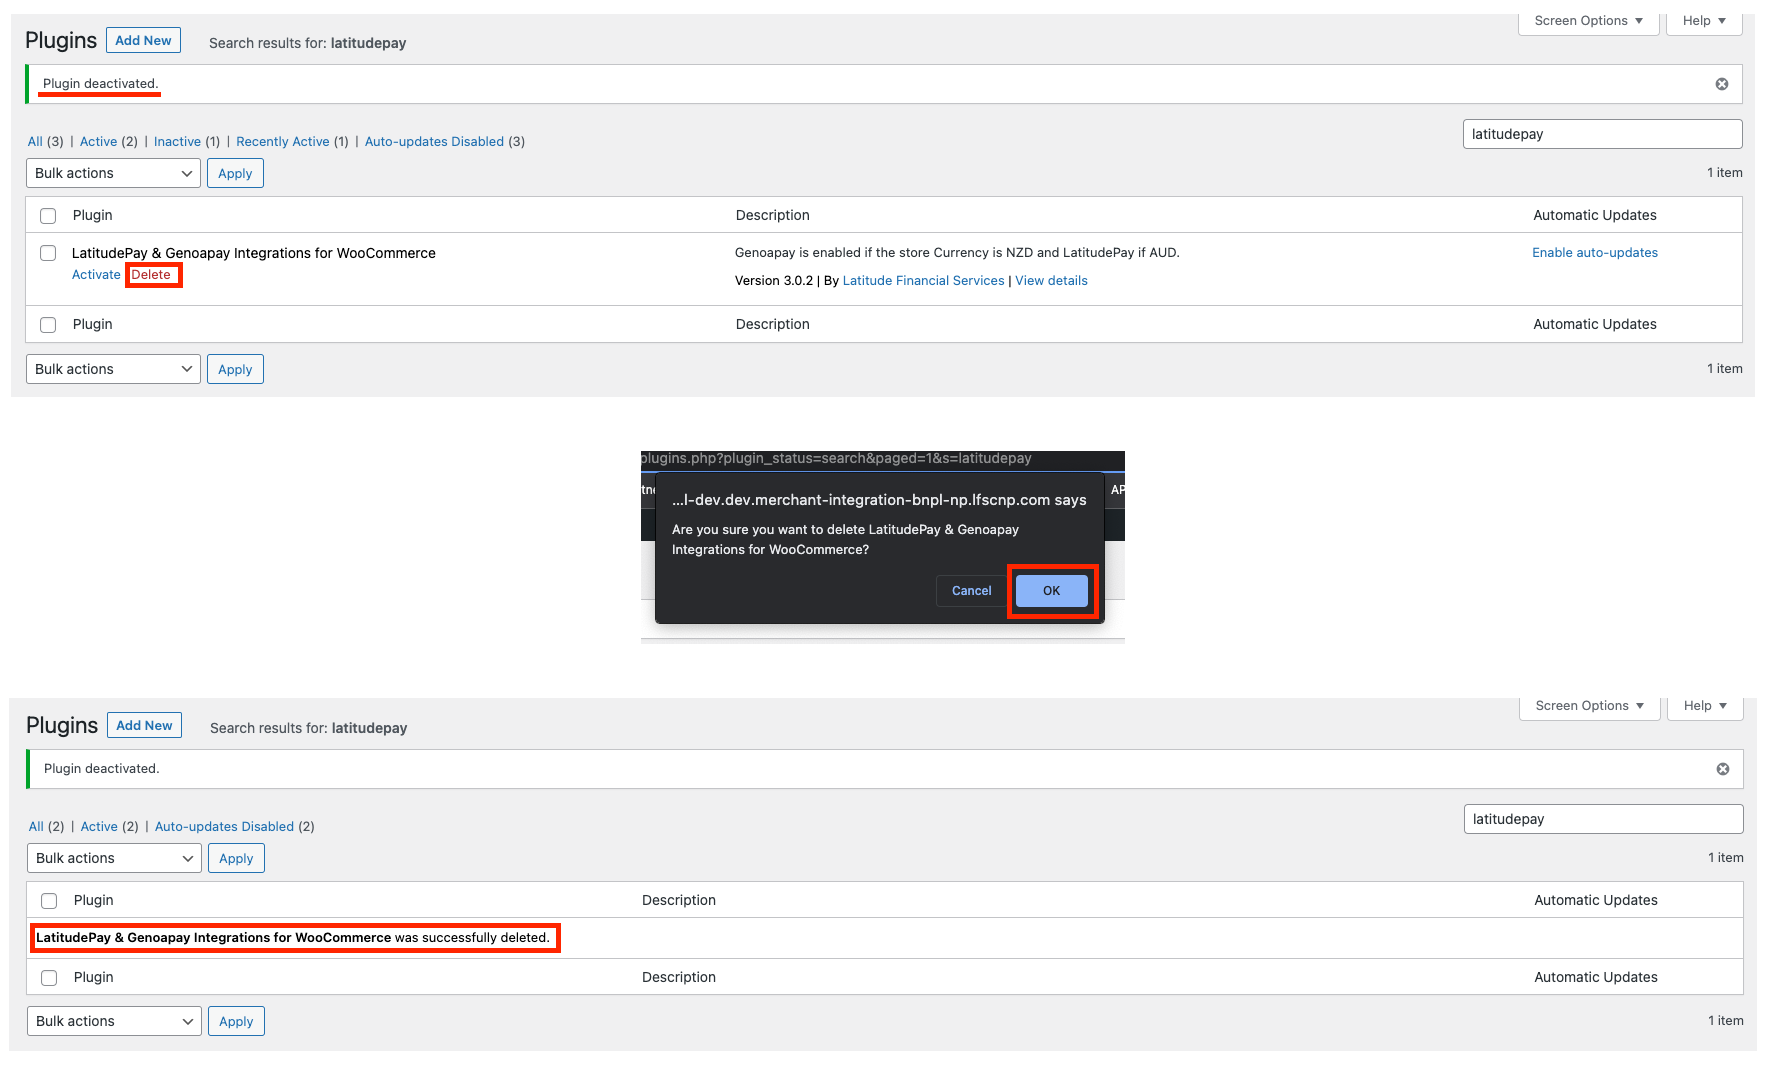
You have now successfully removed the LatitudePay plugin from your WooCommerce site. This means that all assets that were on your site and the option at checkout will no longer be there as an option.