API calls examples
Purpose#
The following document will give you the ability to navigate through our merchant sandbox portal and also give you the ability to run through some test transactions with the help of Postman.
Please see the examples below to familiarize yourself with different API requests and responses. The script used on Postman is for your reference only and you are advised to generate your own function to suit your programming language.
Prerequisites#
LatitudePay Merchant API Key and Merchant API Secret
a. Sandbox Merchant Portal
b. How to locate API keys
c. API keys request formPostman
a. Postman Web(RECOMMENDED)
b. Postman Desktop App
Setup LatitudePay Postman Collection#
- Download LatitudePay Collection JSON: LatitudePay API Calls Collection.postman_collection.json
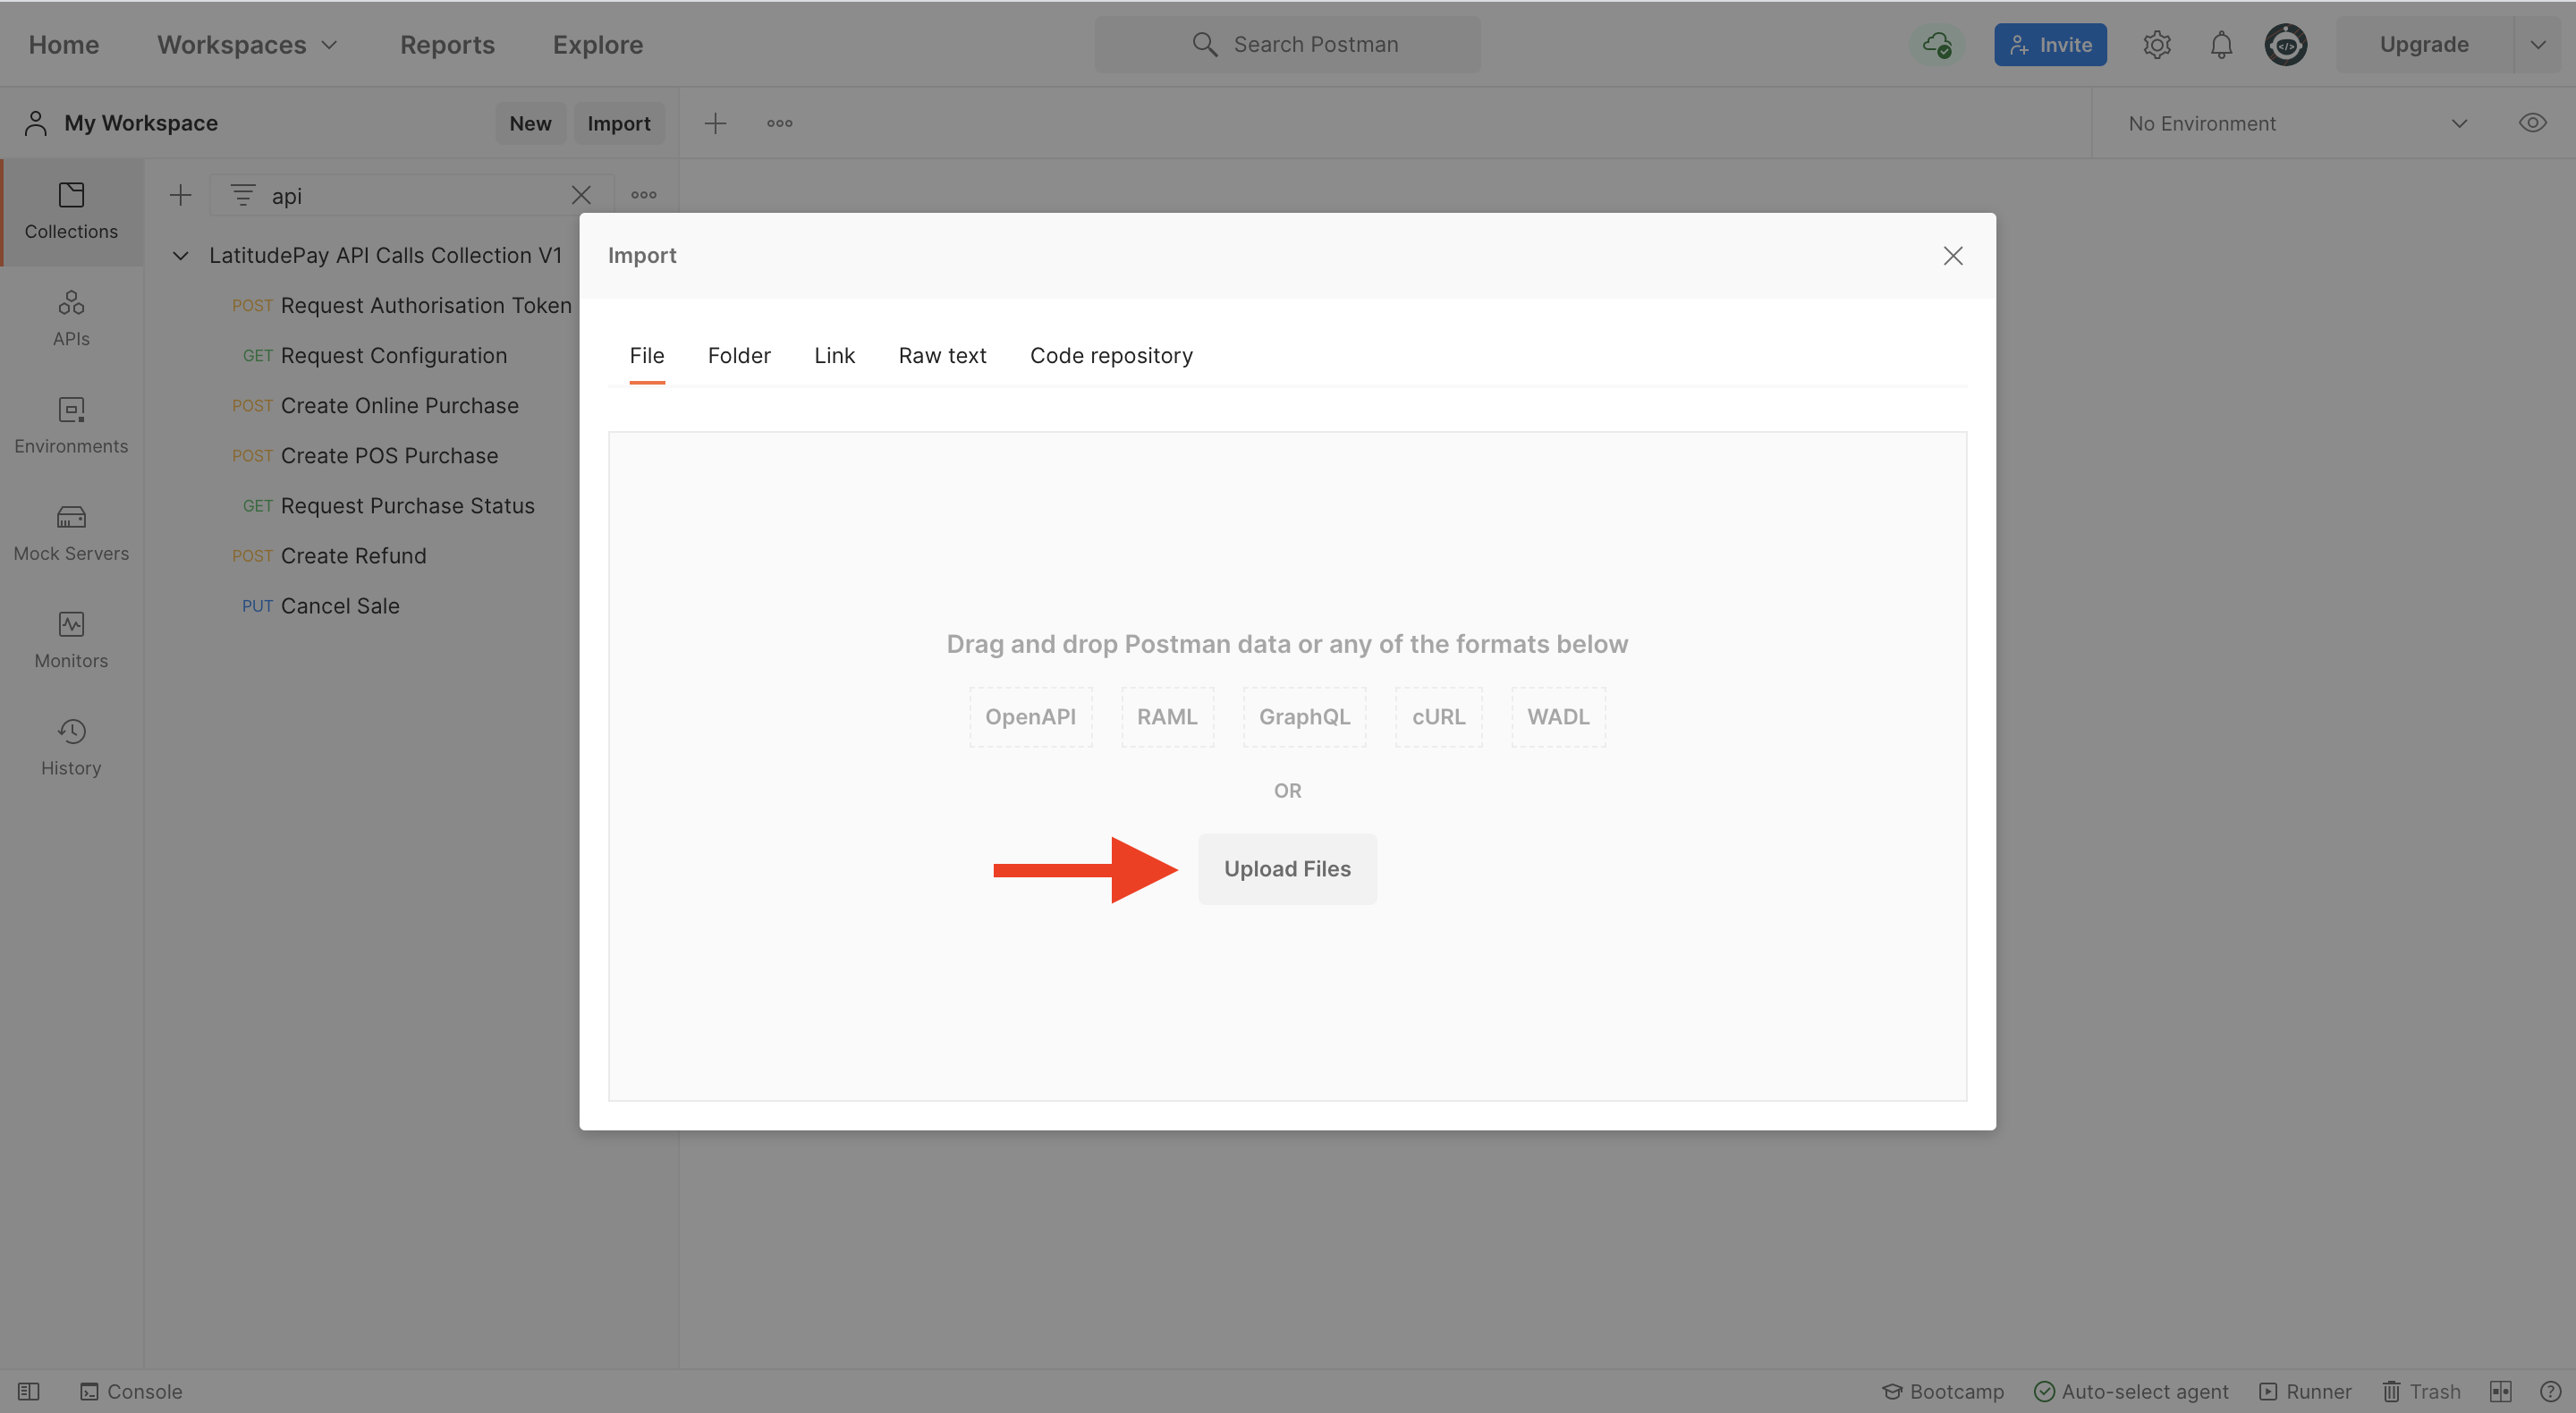
- Import the JSON file into your Postman workspace
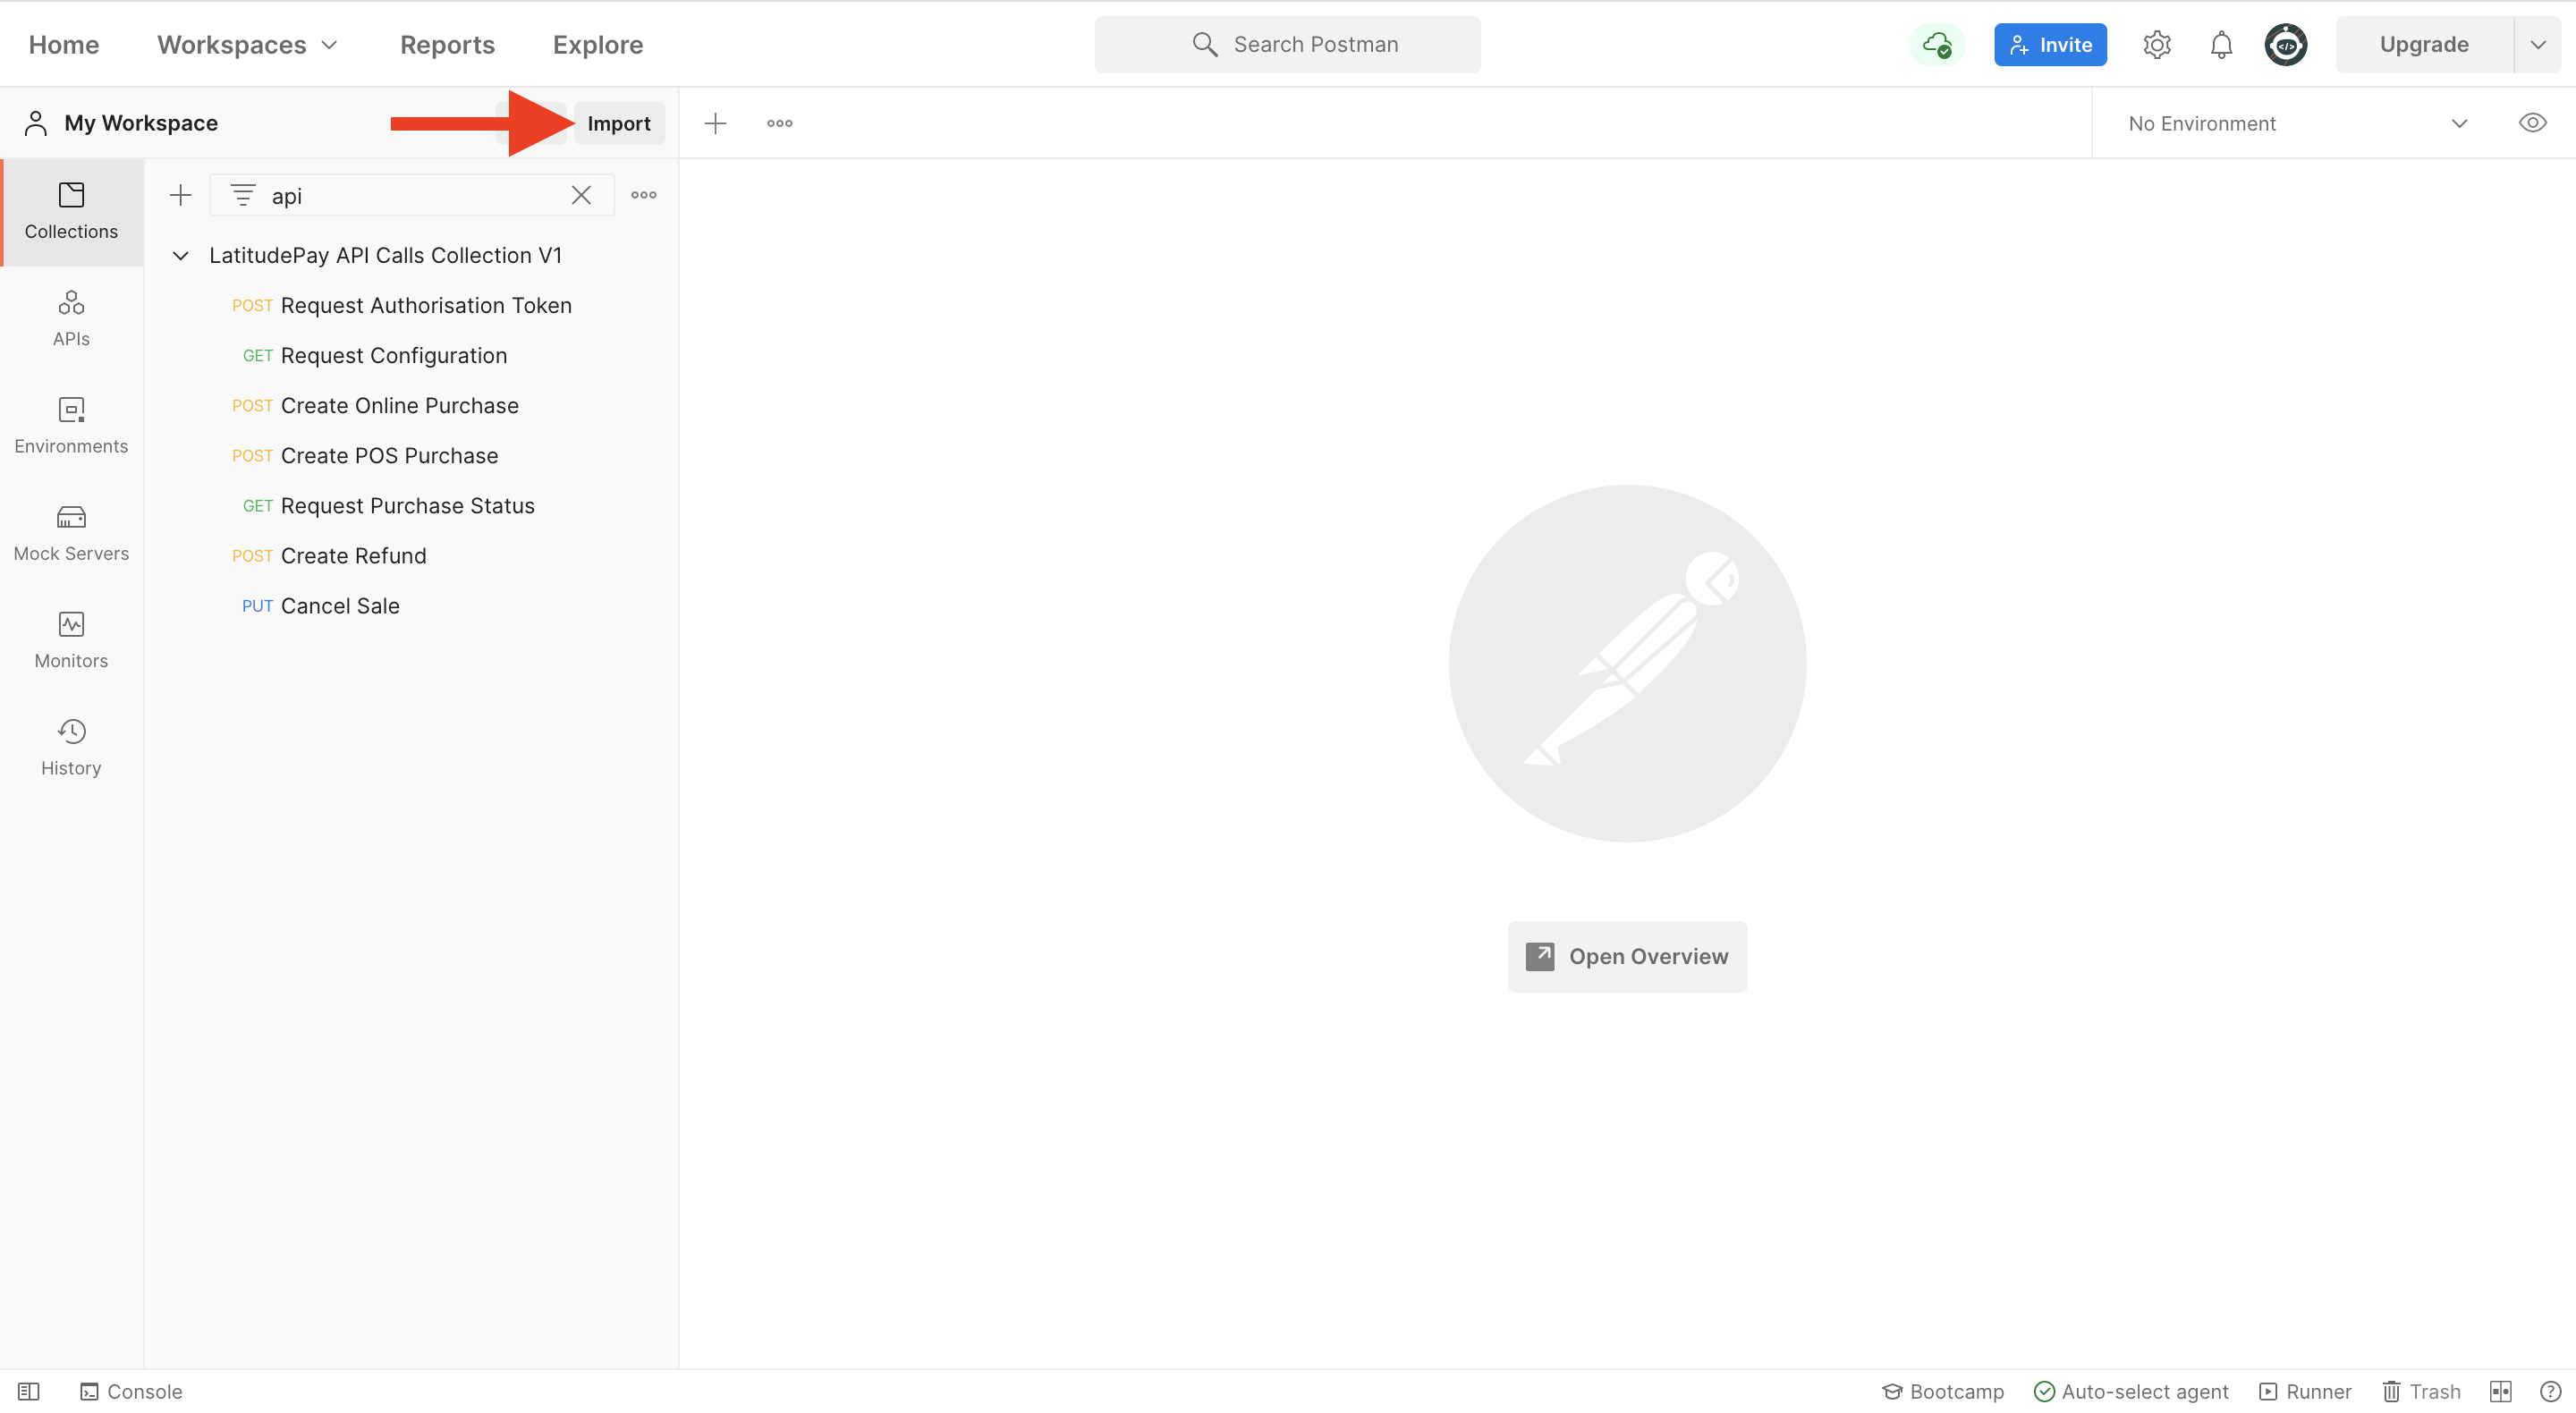
- Drag-and-drop the JSON file or click the Upload Files button
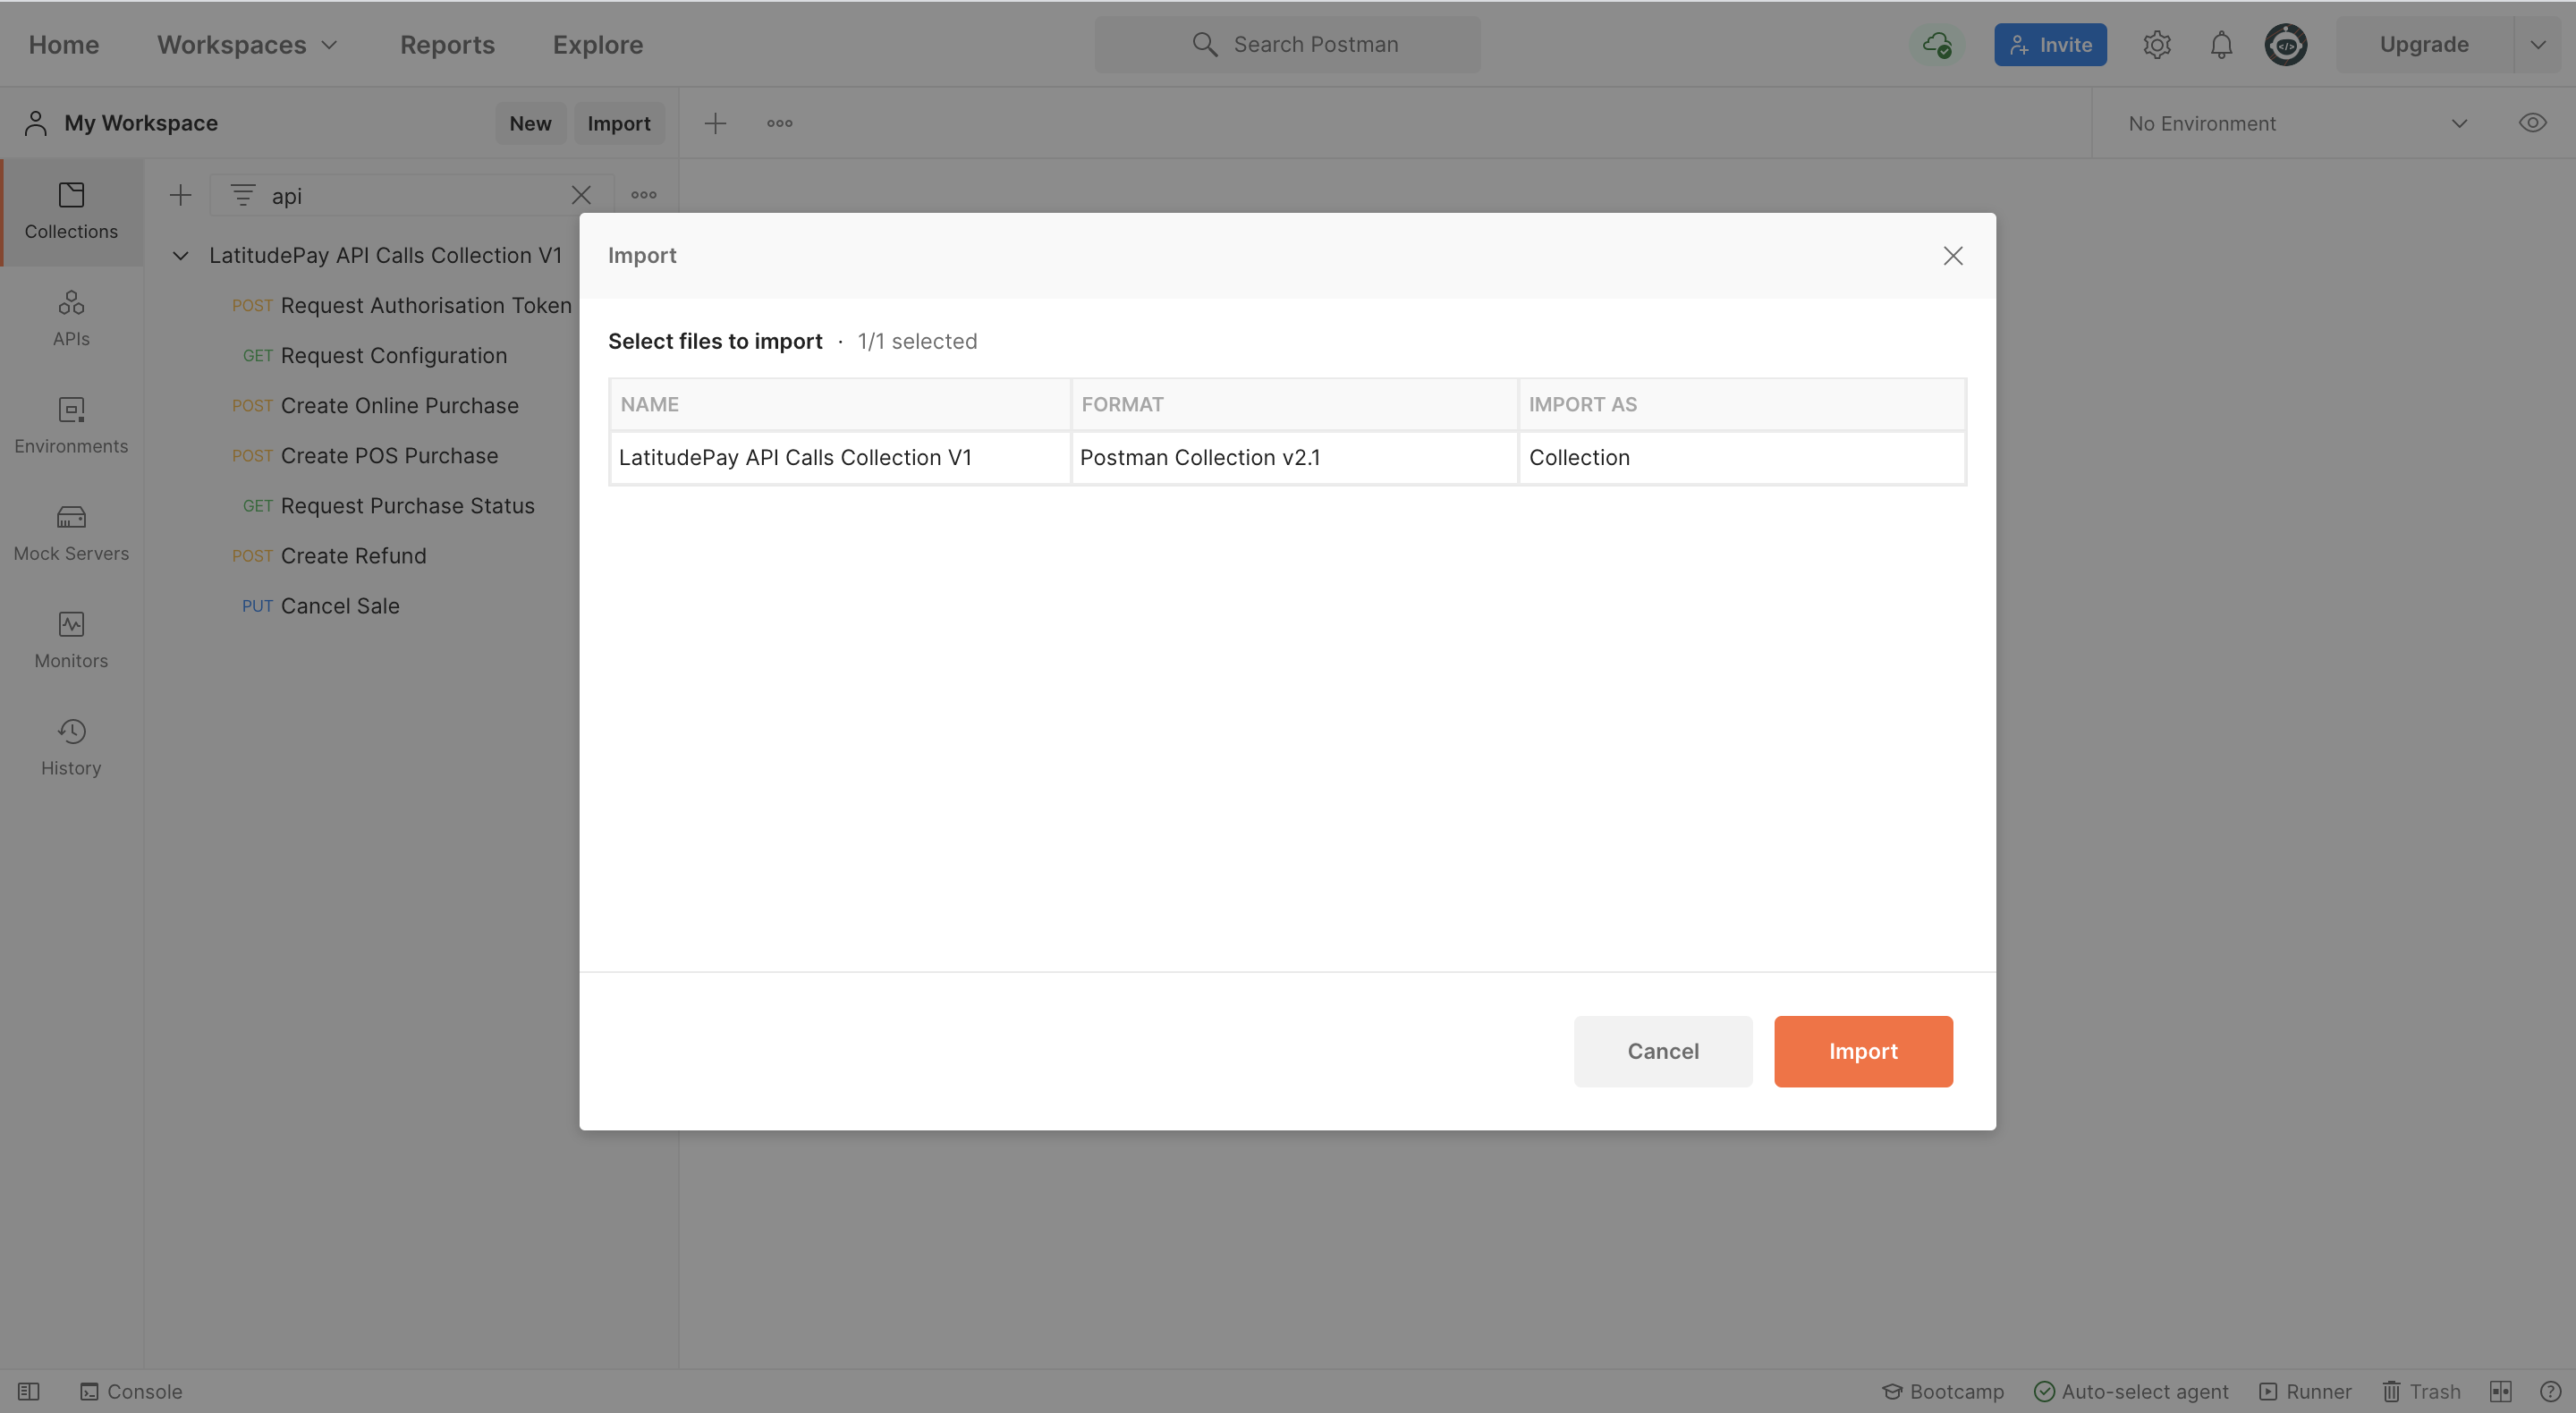
- Make sure you are importing LatitudePay API Calls Collection and confirm by clicking Import button
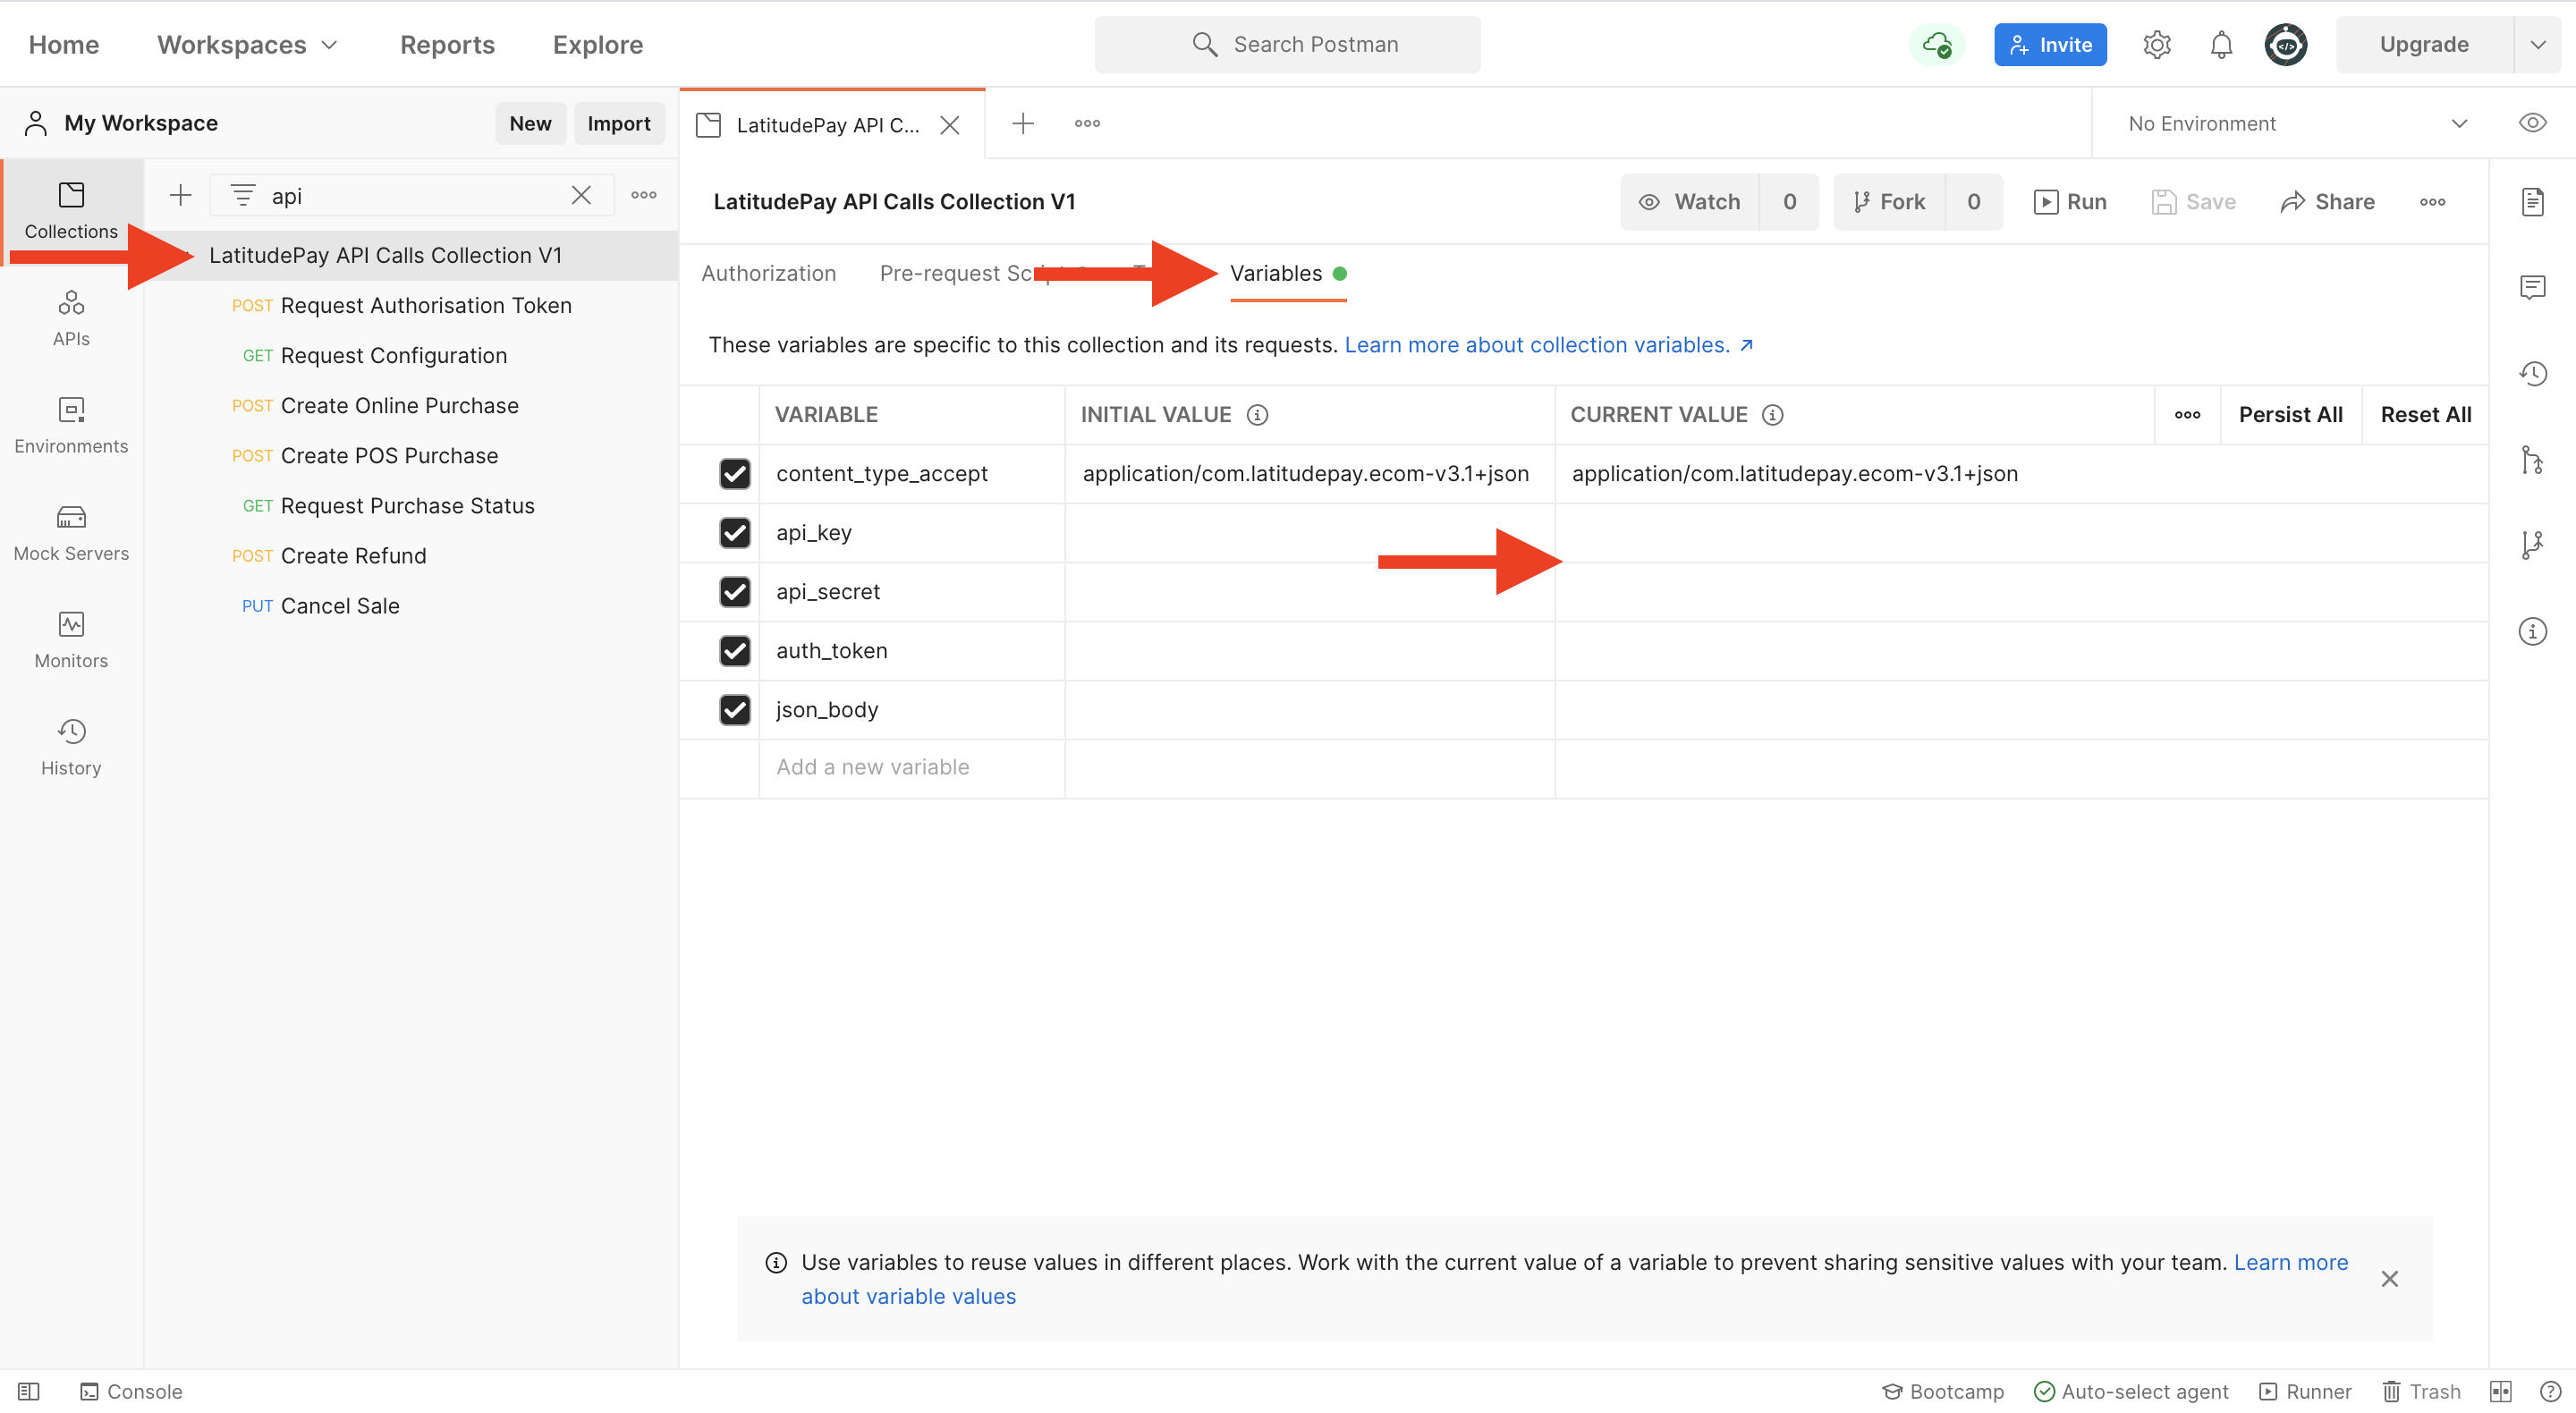
- Click on the collection name, then click Variables to open the list of collection variables, and paste your Merchant API Credentials under API Key and API Secret
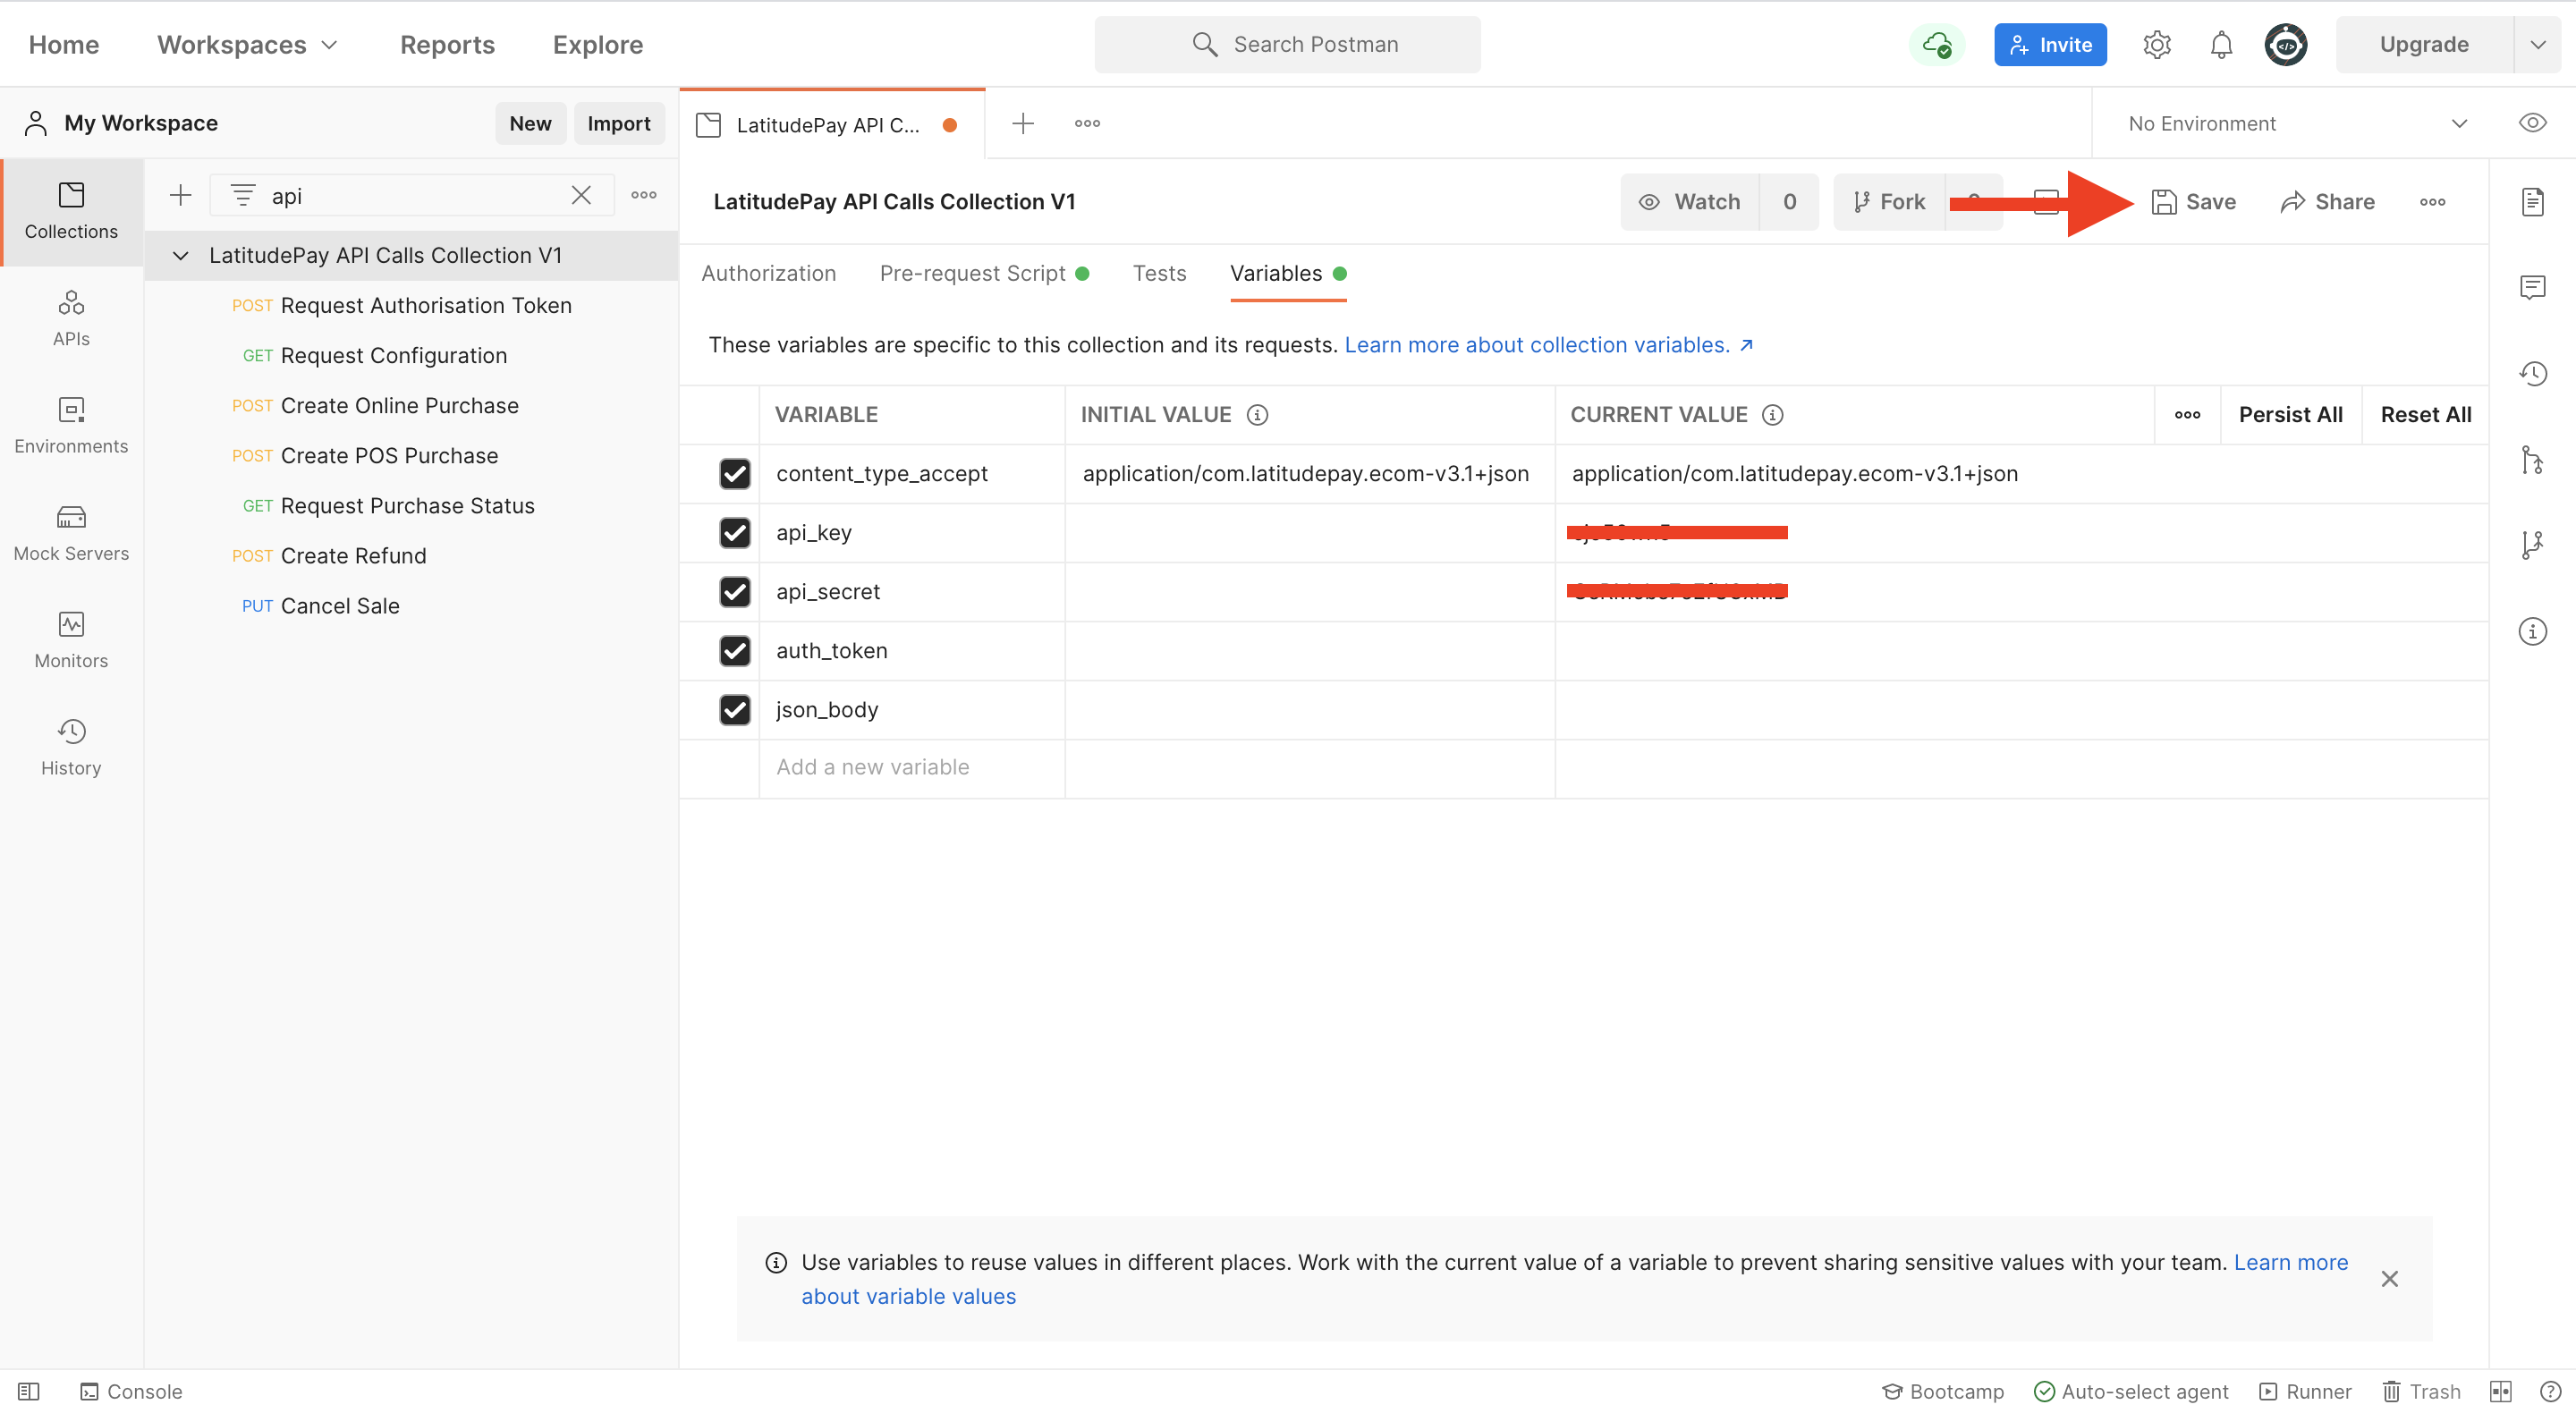
- Save your changes by clicking the Save button or Ctrl+S (Windows) or Command+S (Mac)
List of API Calls in the Collection#
We recommend you review LatitudePay eCommerce API Documentationand LatitudePay Signing Mechanismsto provide you with a basic understanding of our requirements and endpoints for a successful integration.
- Request Authorisation Token
- Request Configuration
- Create Online Purchase
- Create POS Purchase
- Request Purchase Status
- Create Refund
- Cancel Sale
Request Authorisation Token#
This endpoint authenticates the merchant server with the LatitudePay API, returning an authToken used to validate the source of subsequent API requests.
This request uses:
- Authorisation: API Key and API Secret
- Header: Accept and Content-Type
- Simply press the Send button to execute this request
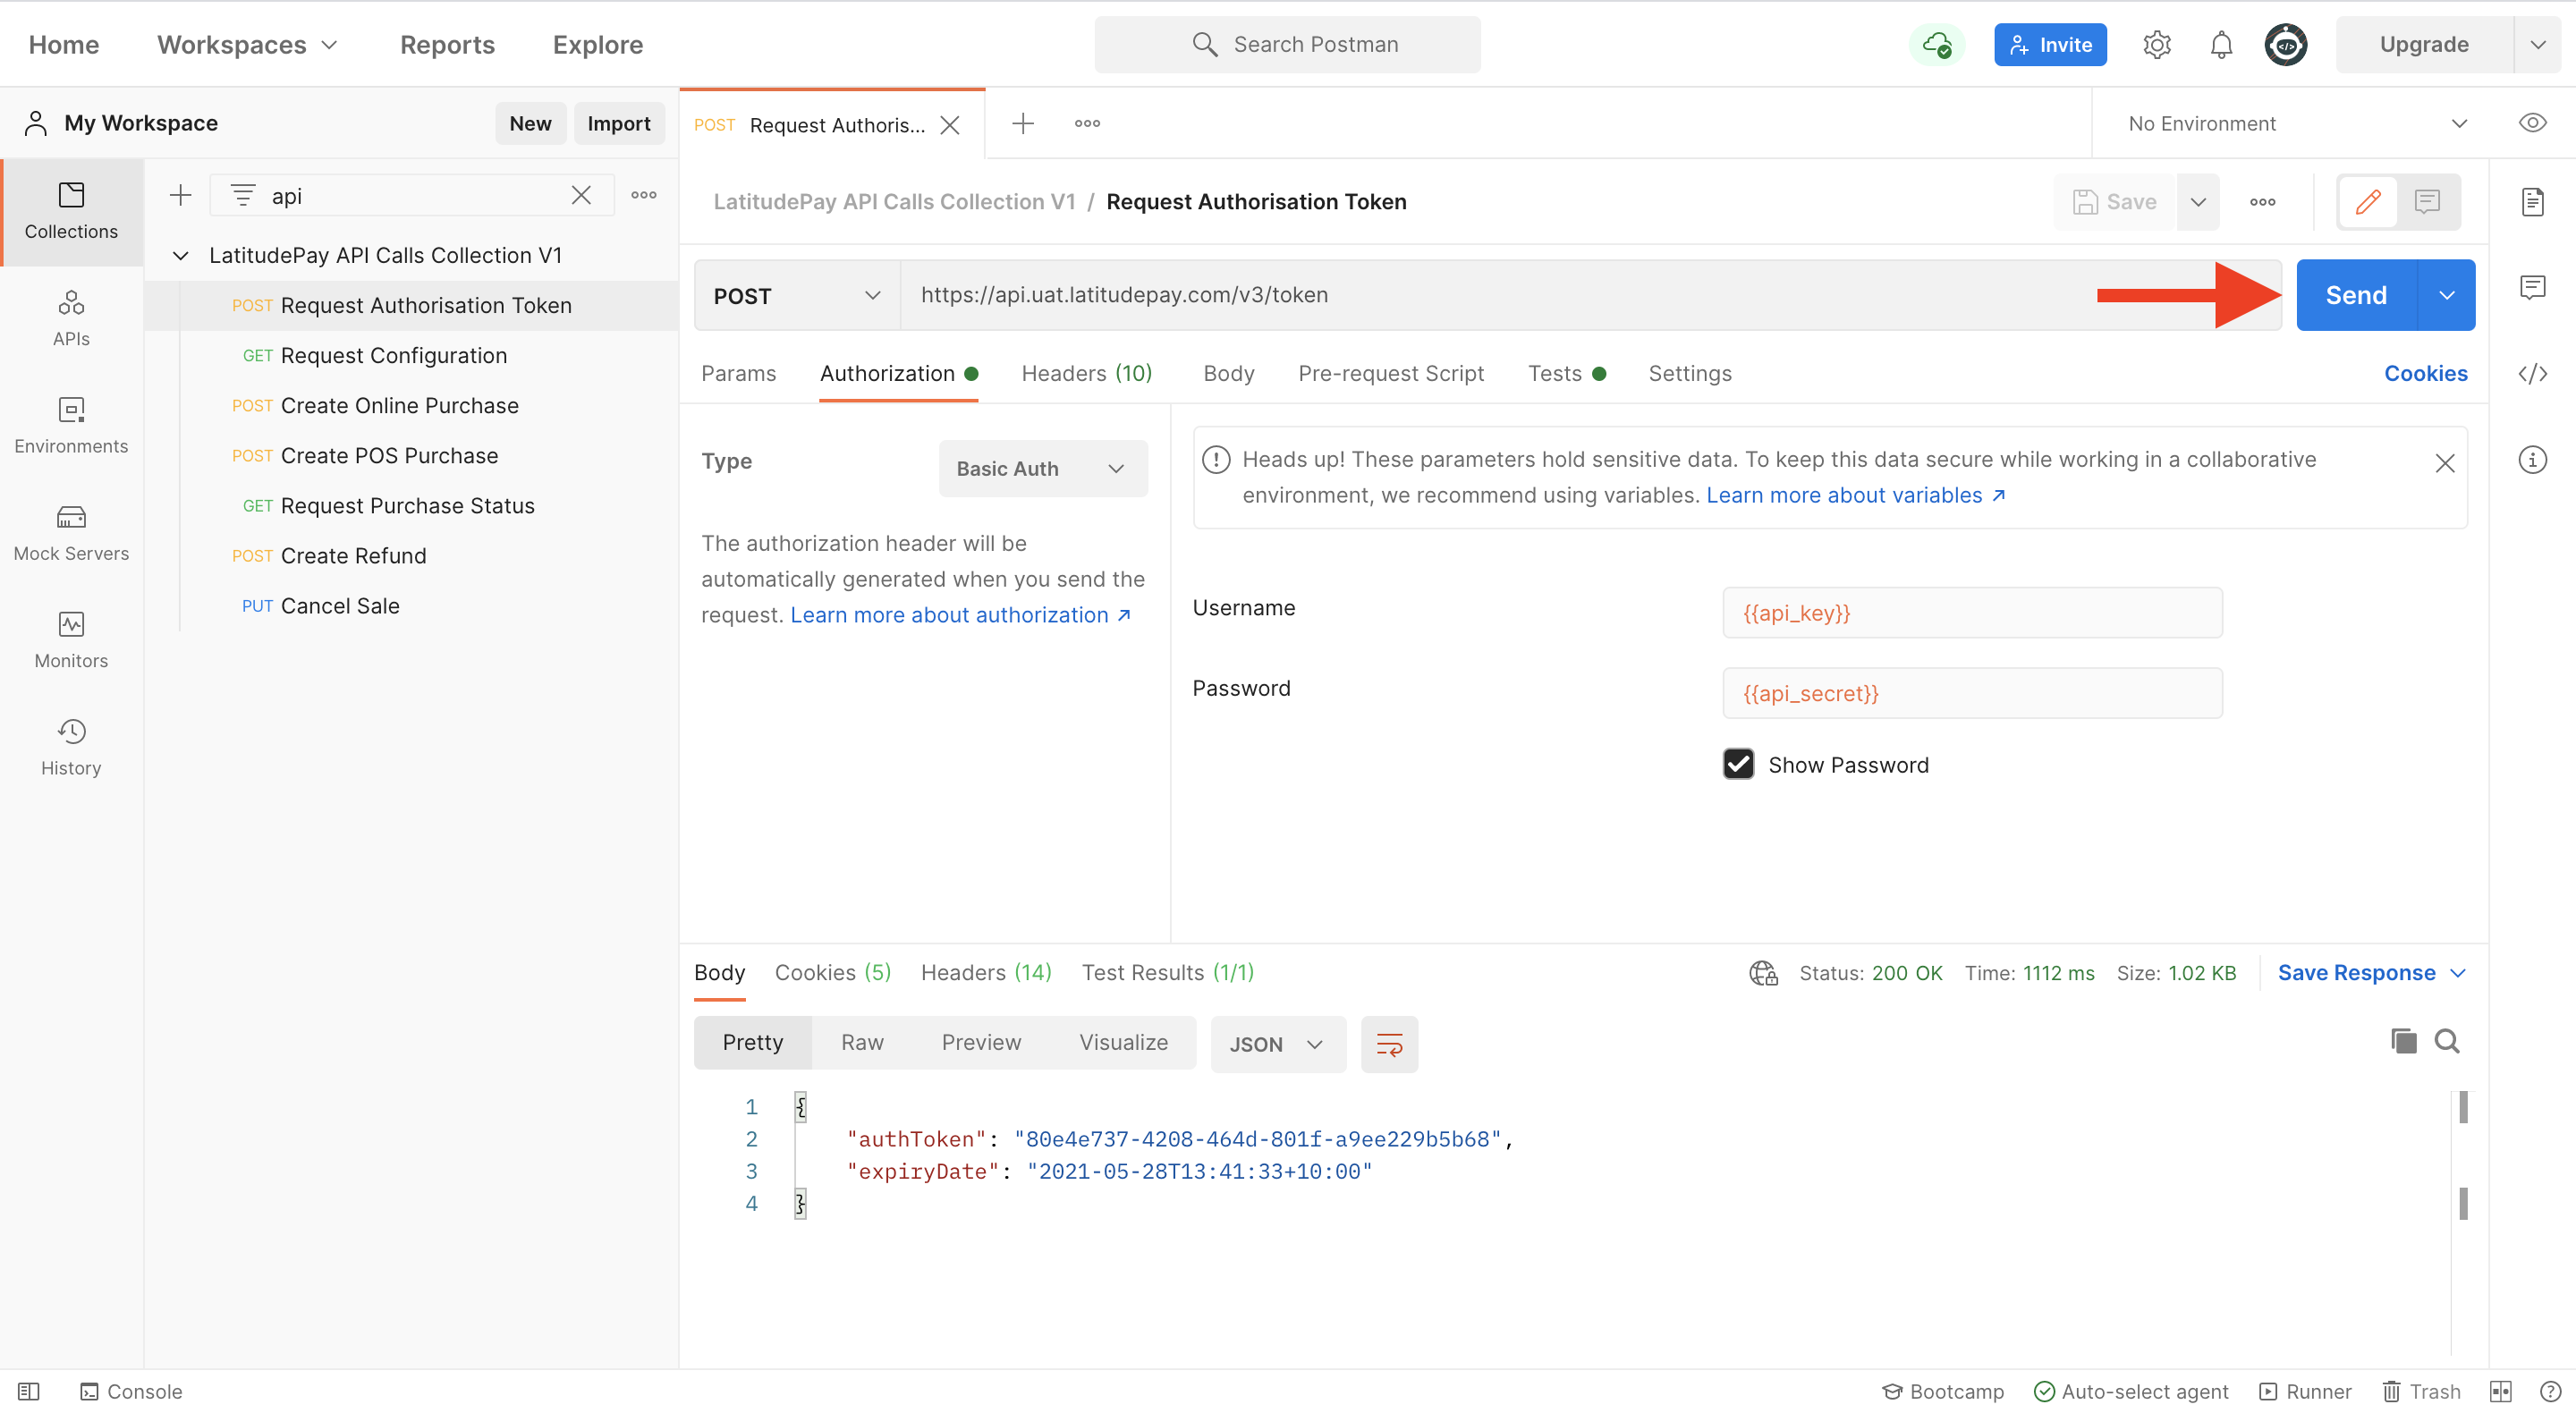
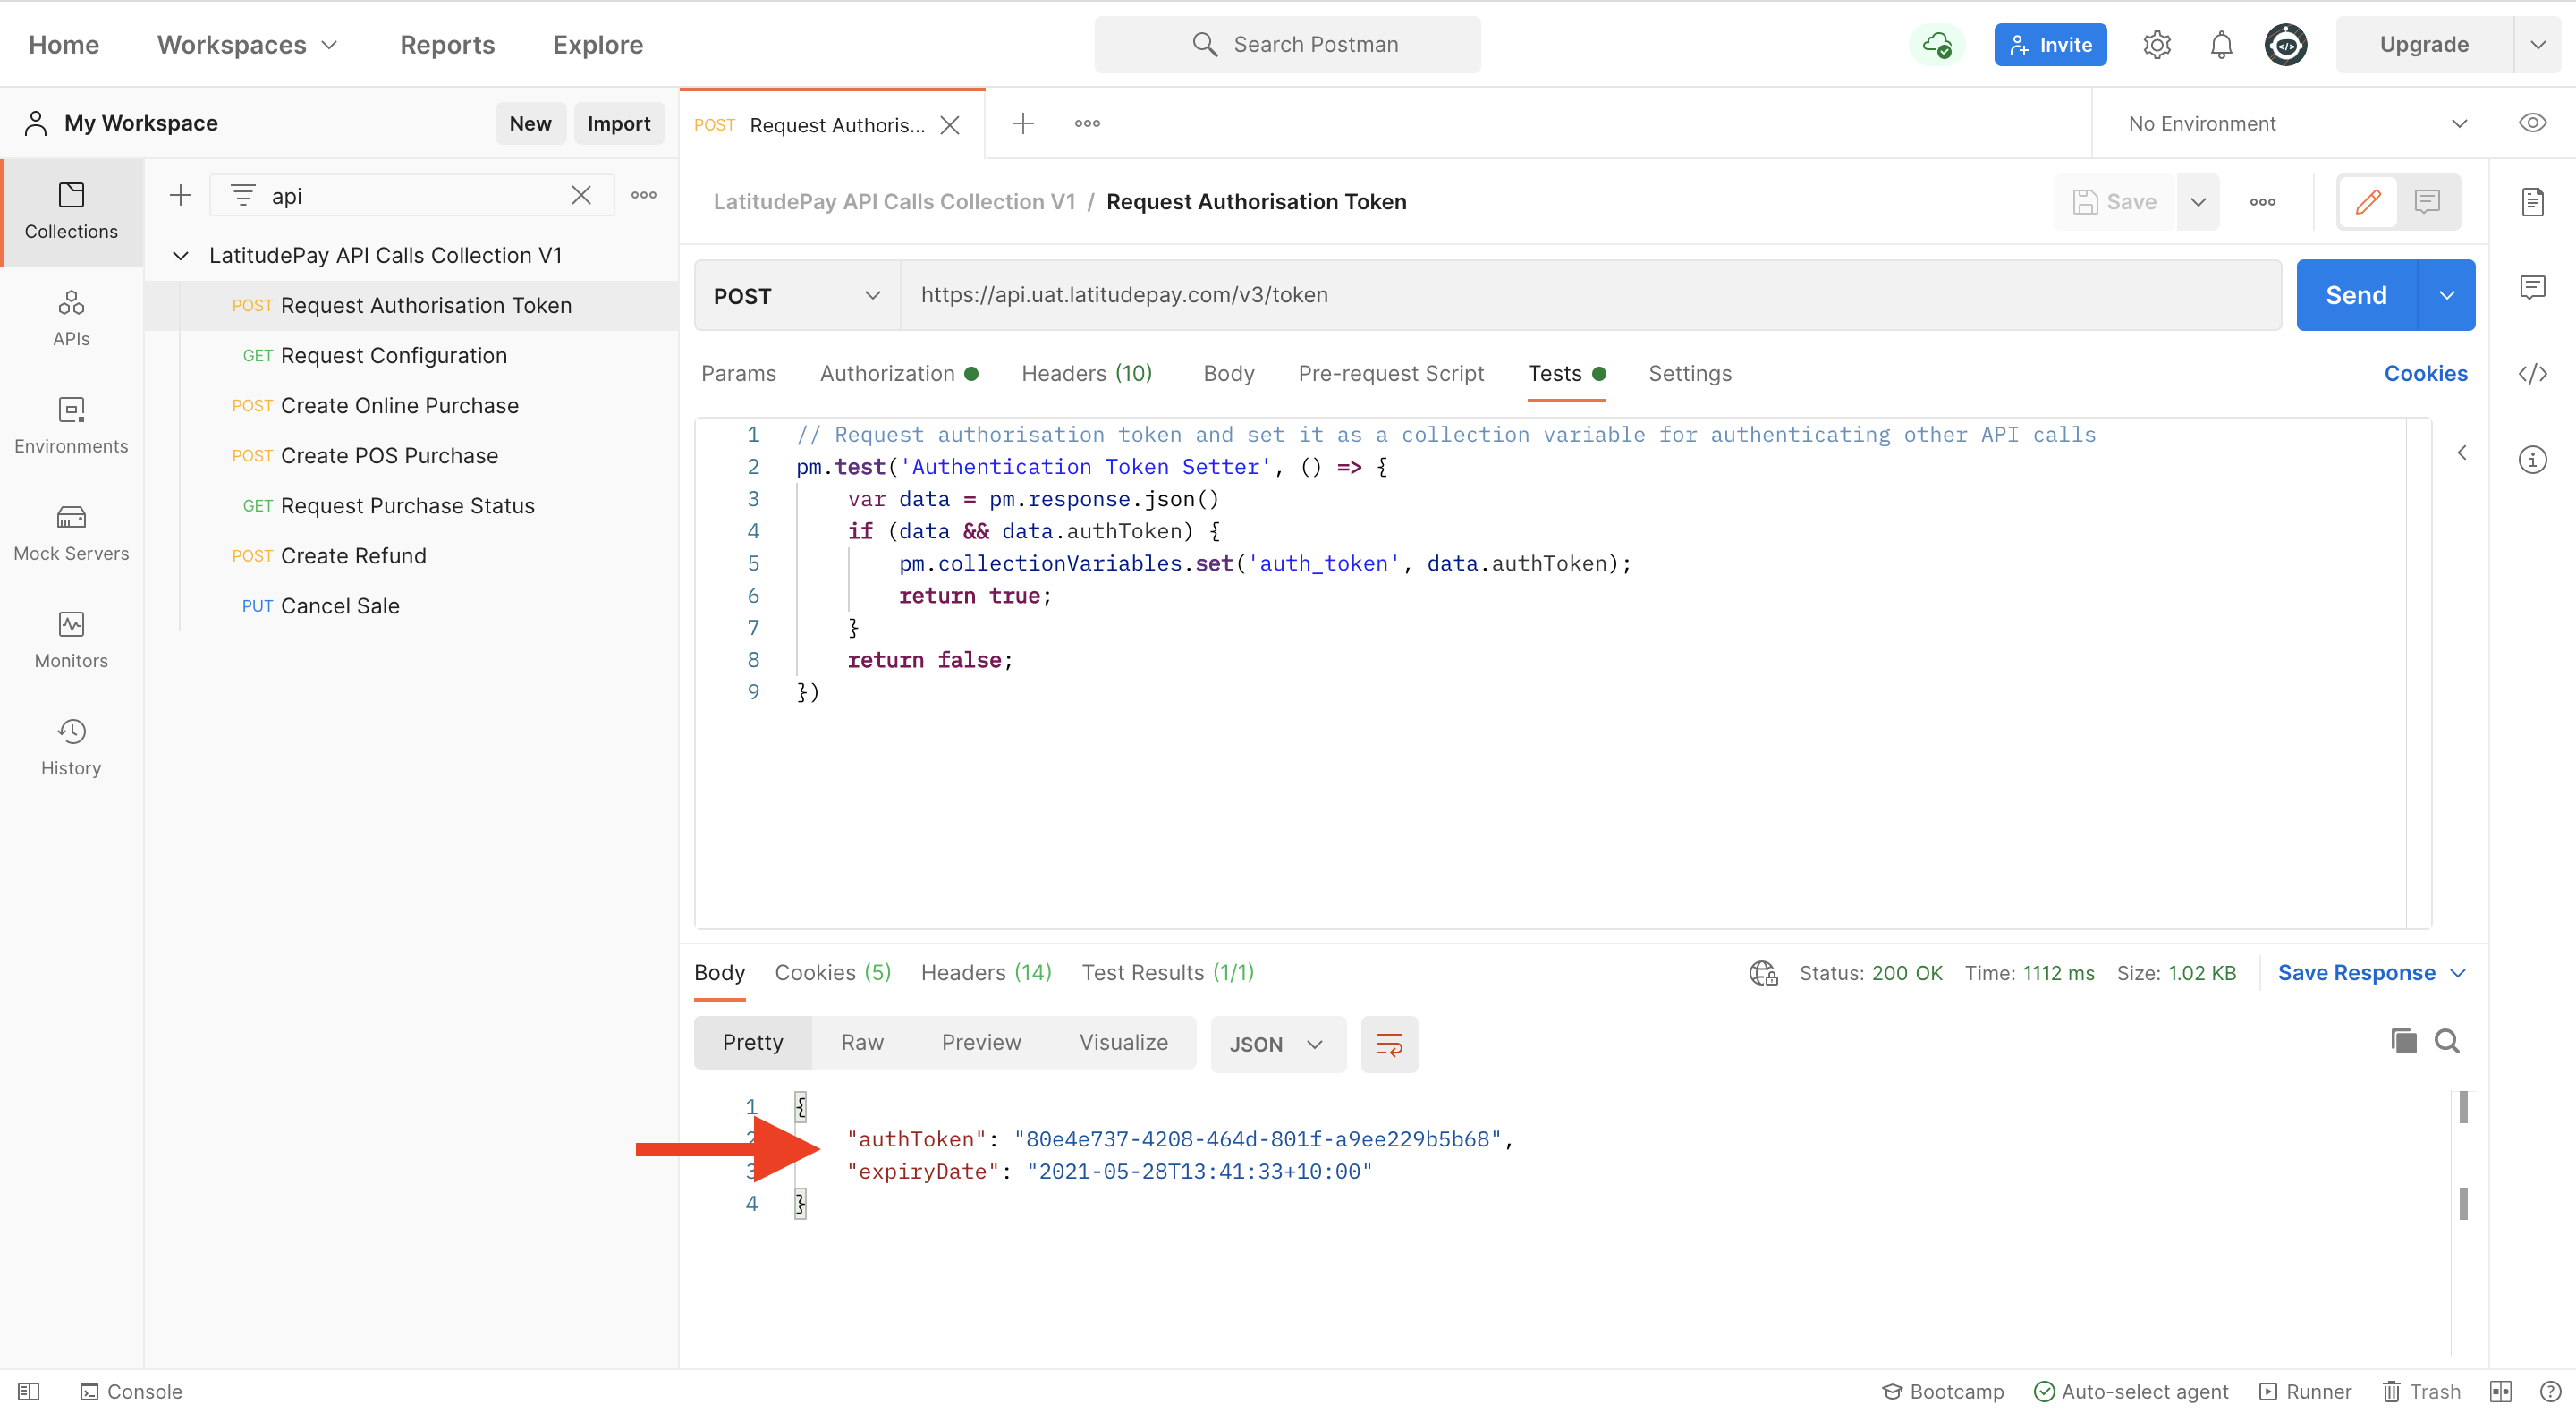
- The JSON response will contain authToken which is saved into a collection variable using scripts written under Tests, i.e., scripts executed after API response is received
Create Online Purchase#
This end point creates a new purchase in the LatitudePay platform. The customer information provided is used to prepopulate the LatitudePay sign up process or identify an existing customer account.
The merchant system should retain the token provided in the purchase response, as this is required in the event that a refund is to be processed.
This request uses:
- Authorization: Bearer Token
- Header: Accept, Content-Type, and X-Idempotency-Key
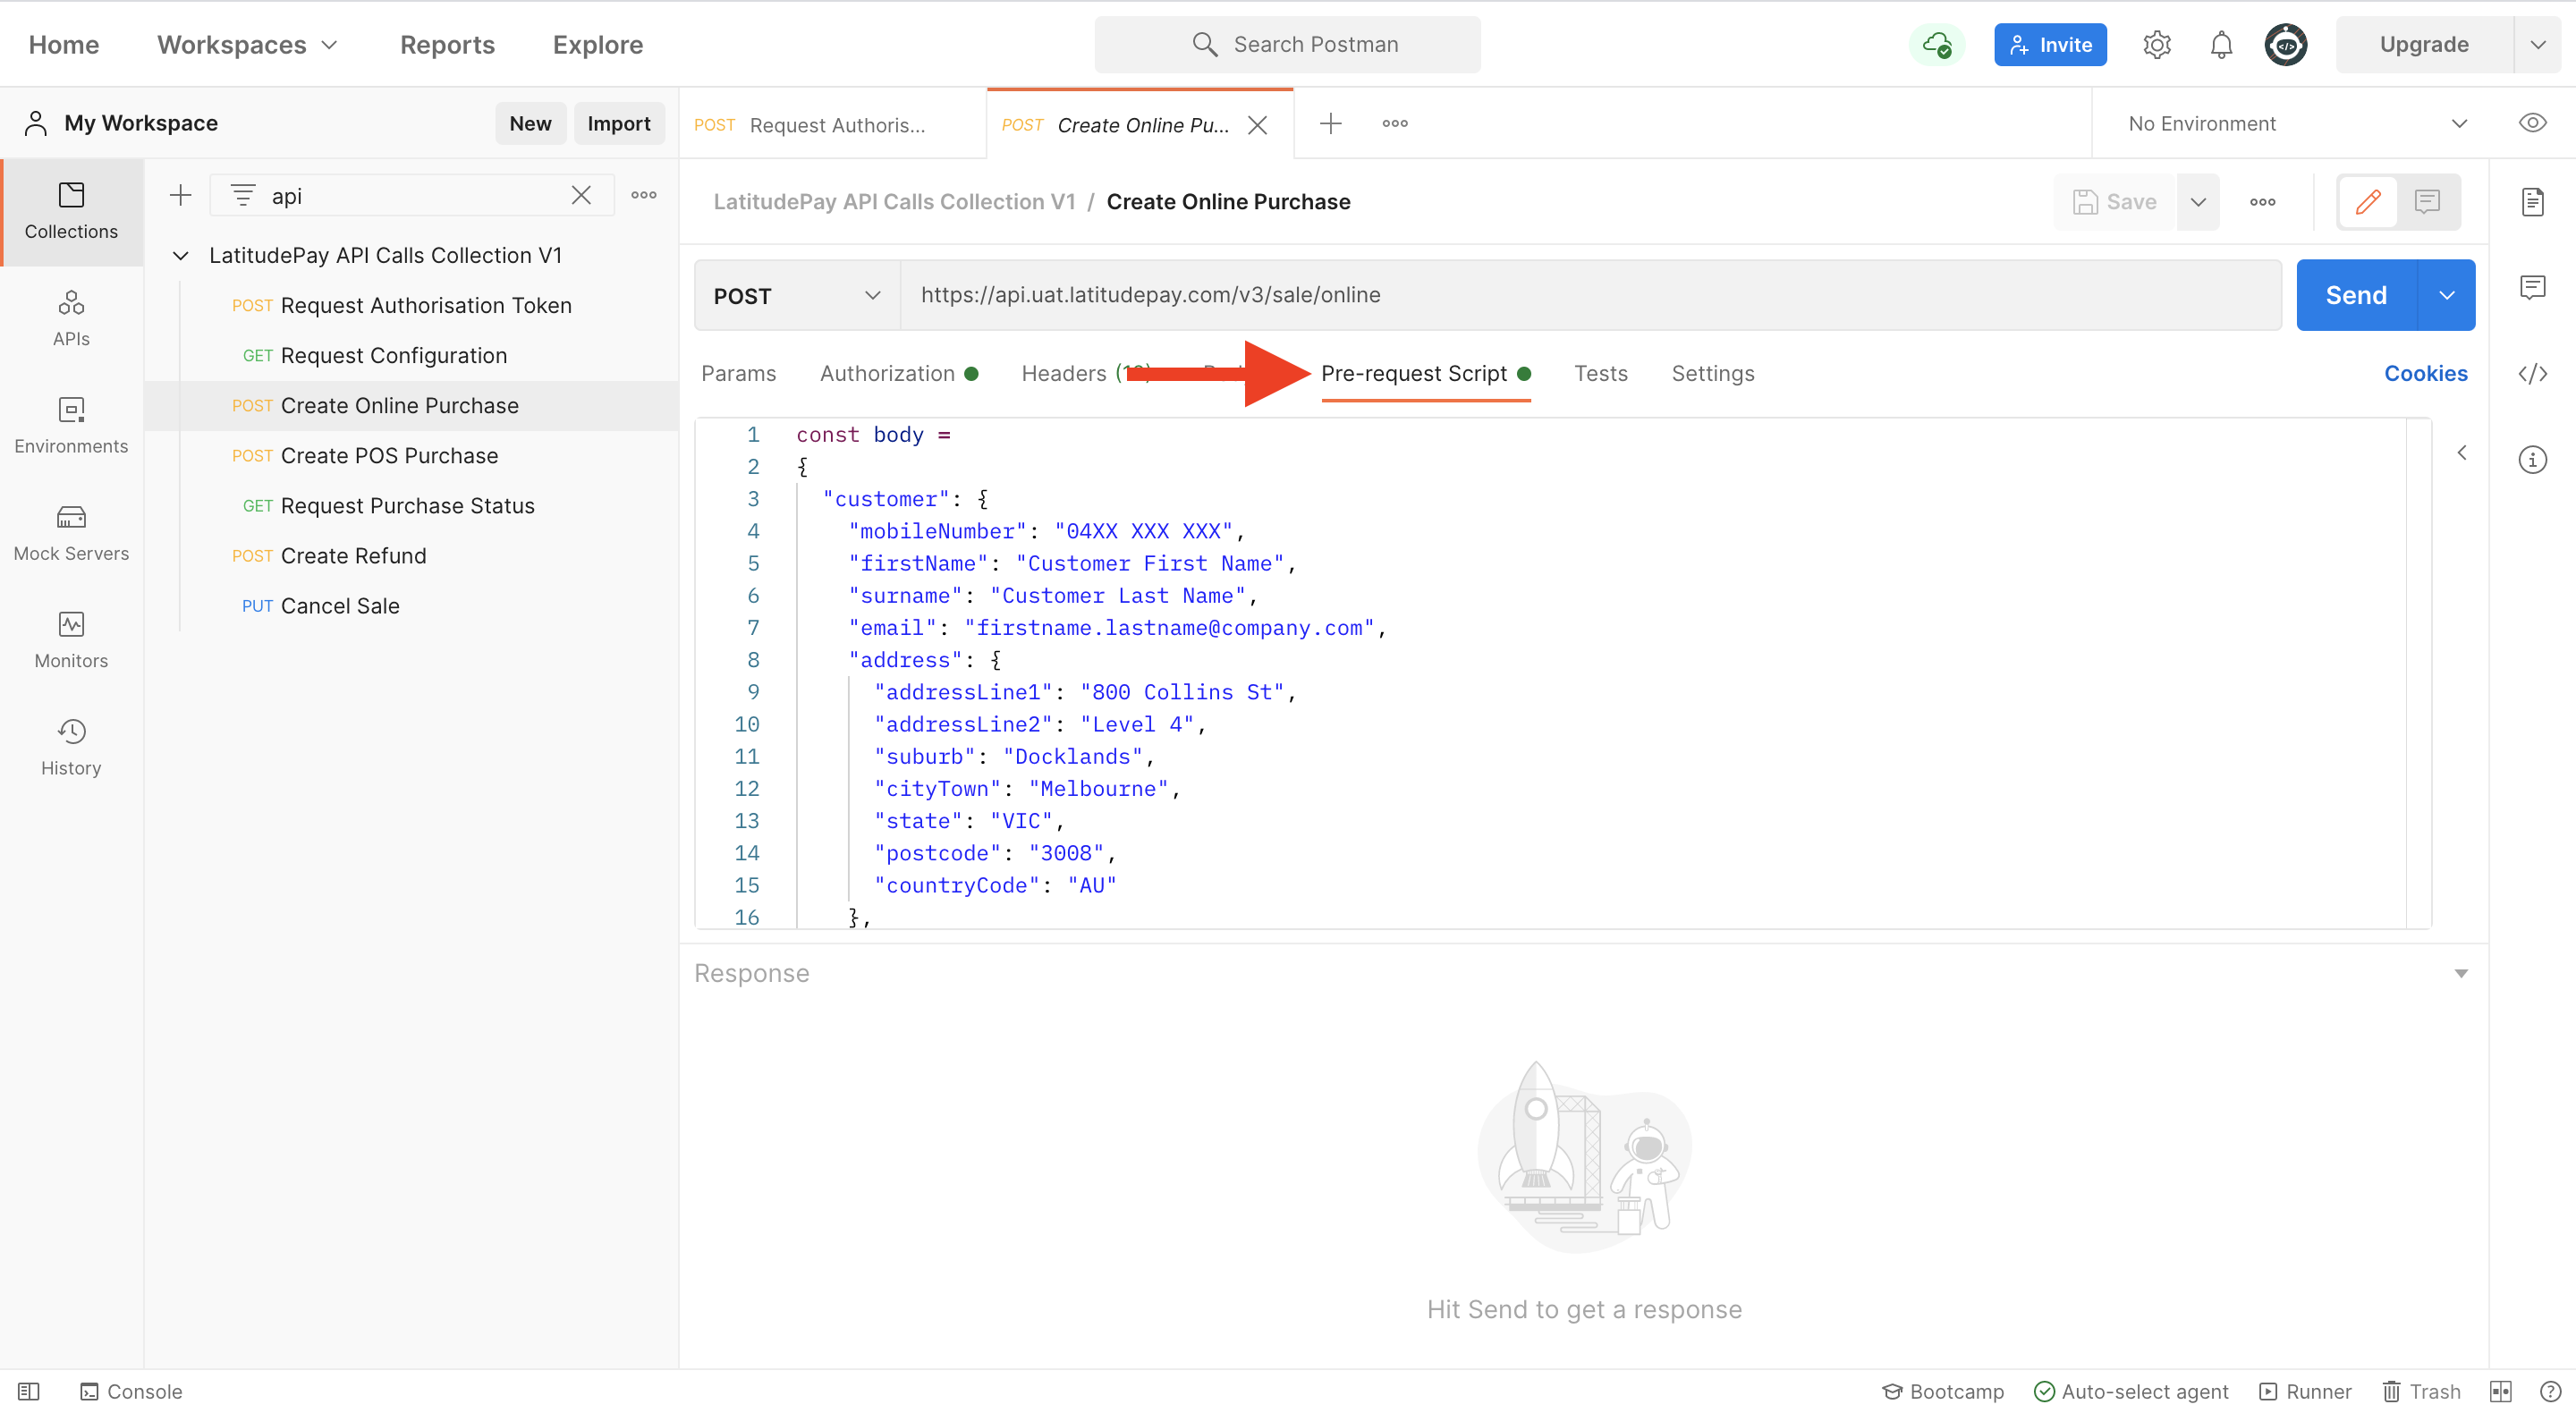
- Body: JSON containing purchase request
- A sample JSON has been provided under Pre-request Script
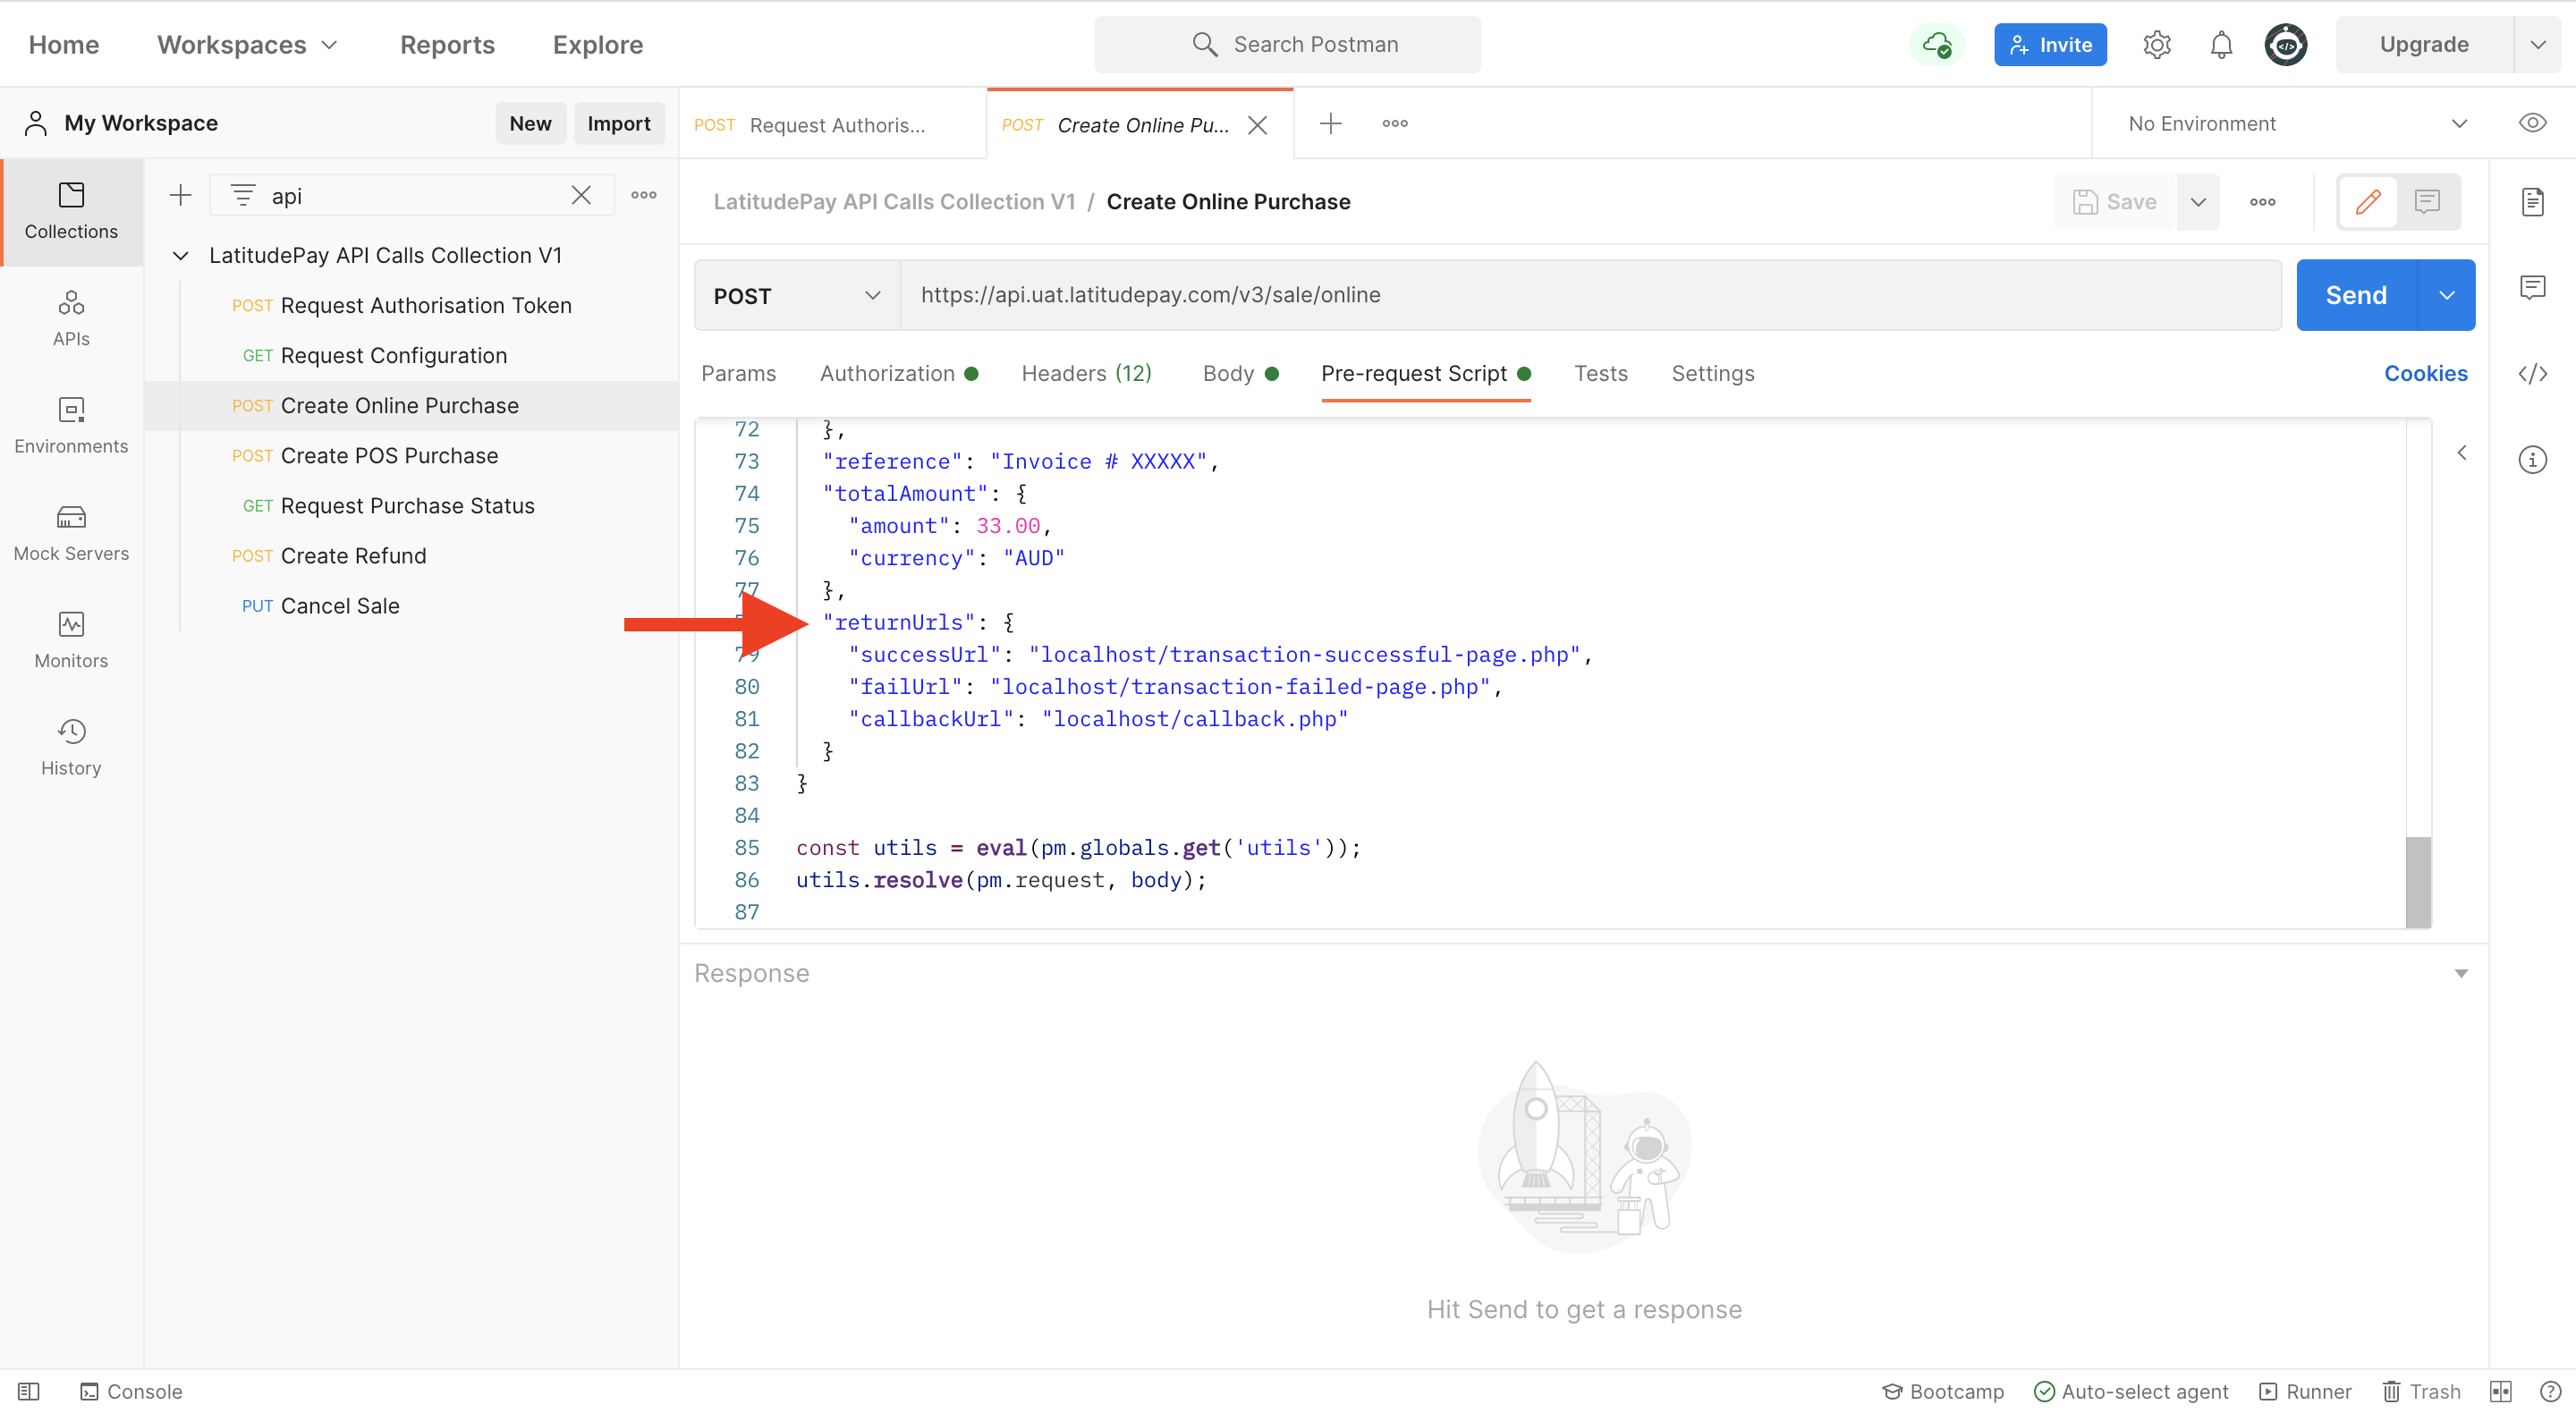
- Please edit the JSON and use valid returnUrls (if any) to redirect customer after attempting payment
- After clicking Send, the JSON response will contain paymentUrl which allows customer to proceed with payment – please copy and paste this link onto your browser address bar to test the link (do not click this link on Postman as it will not open the web page)
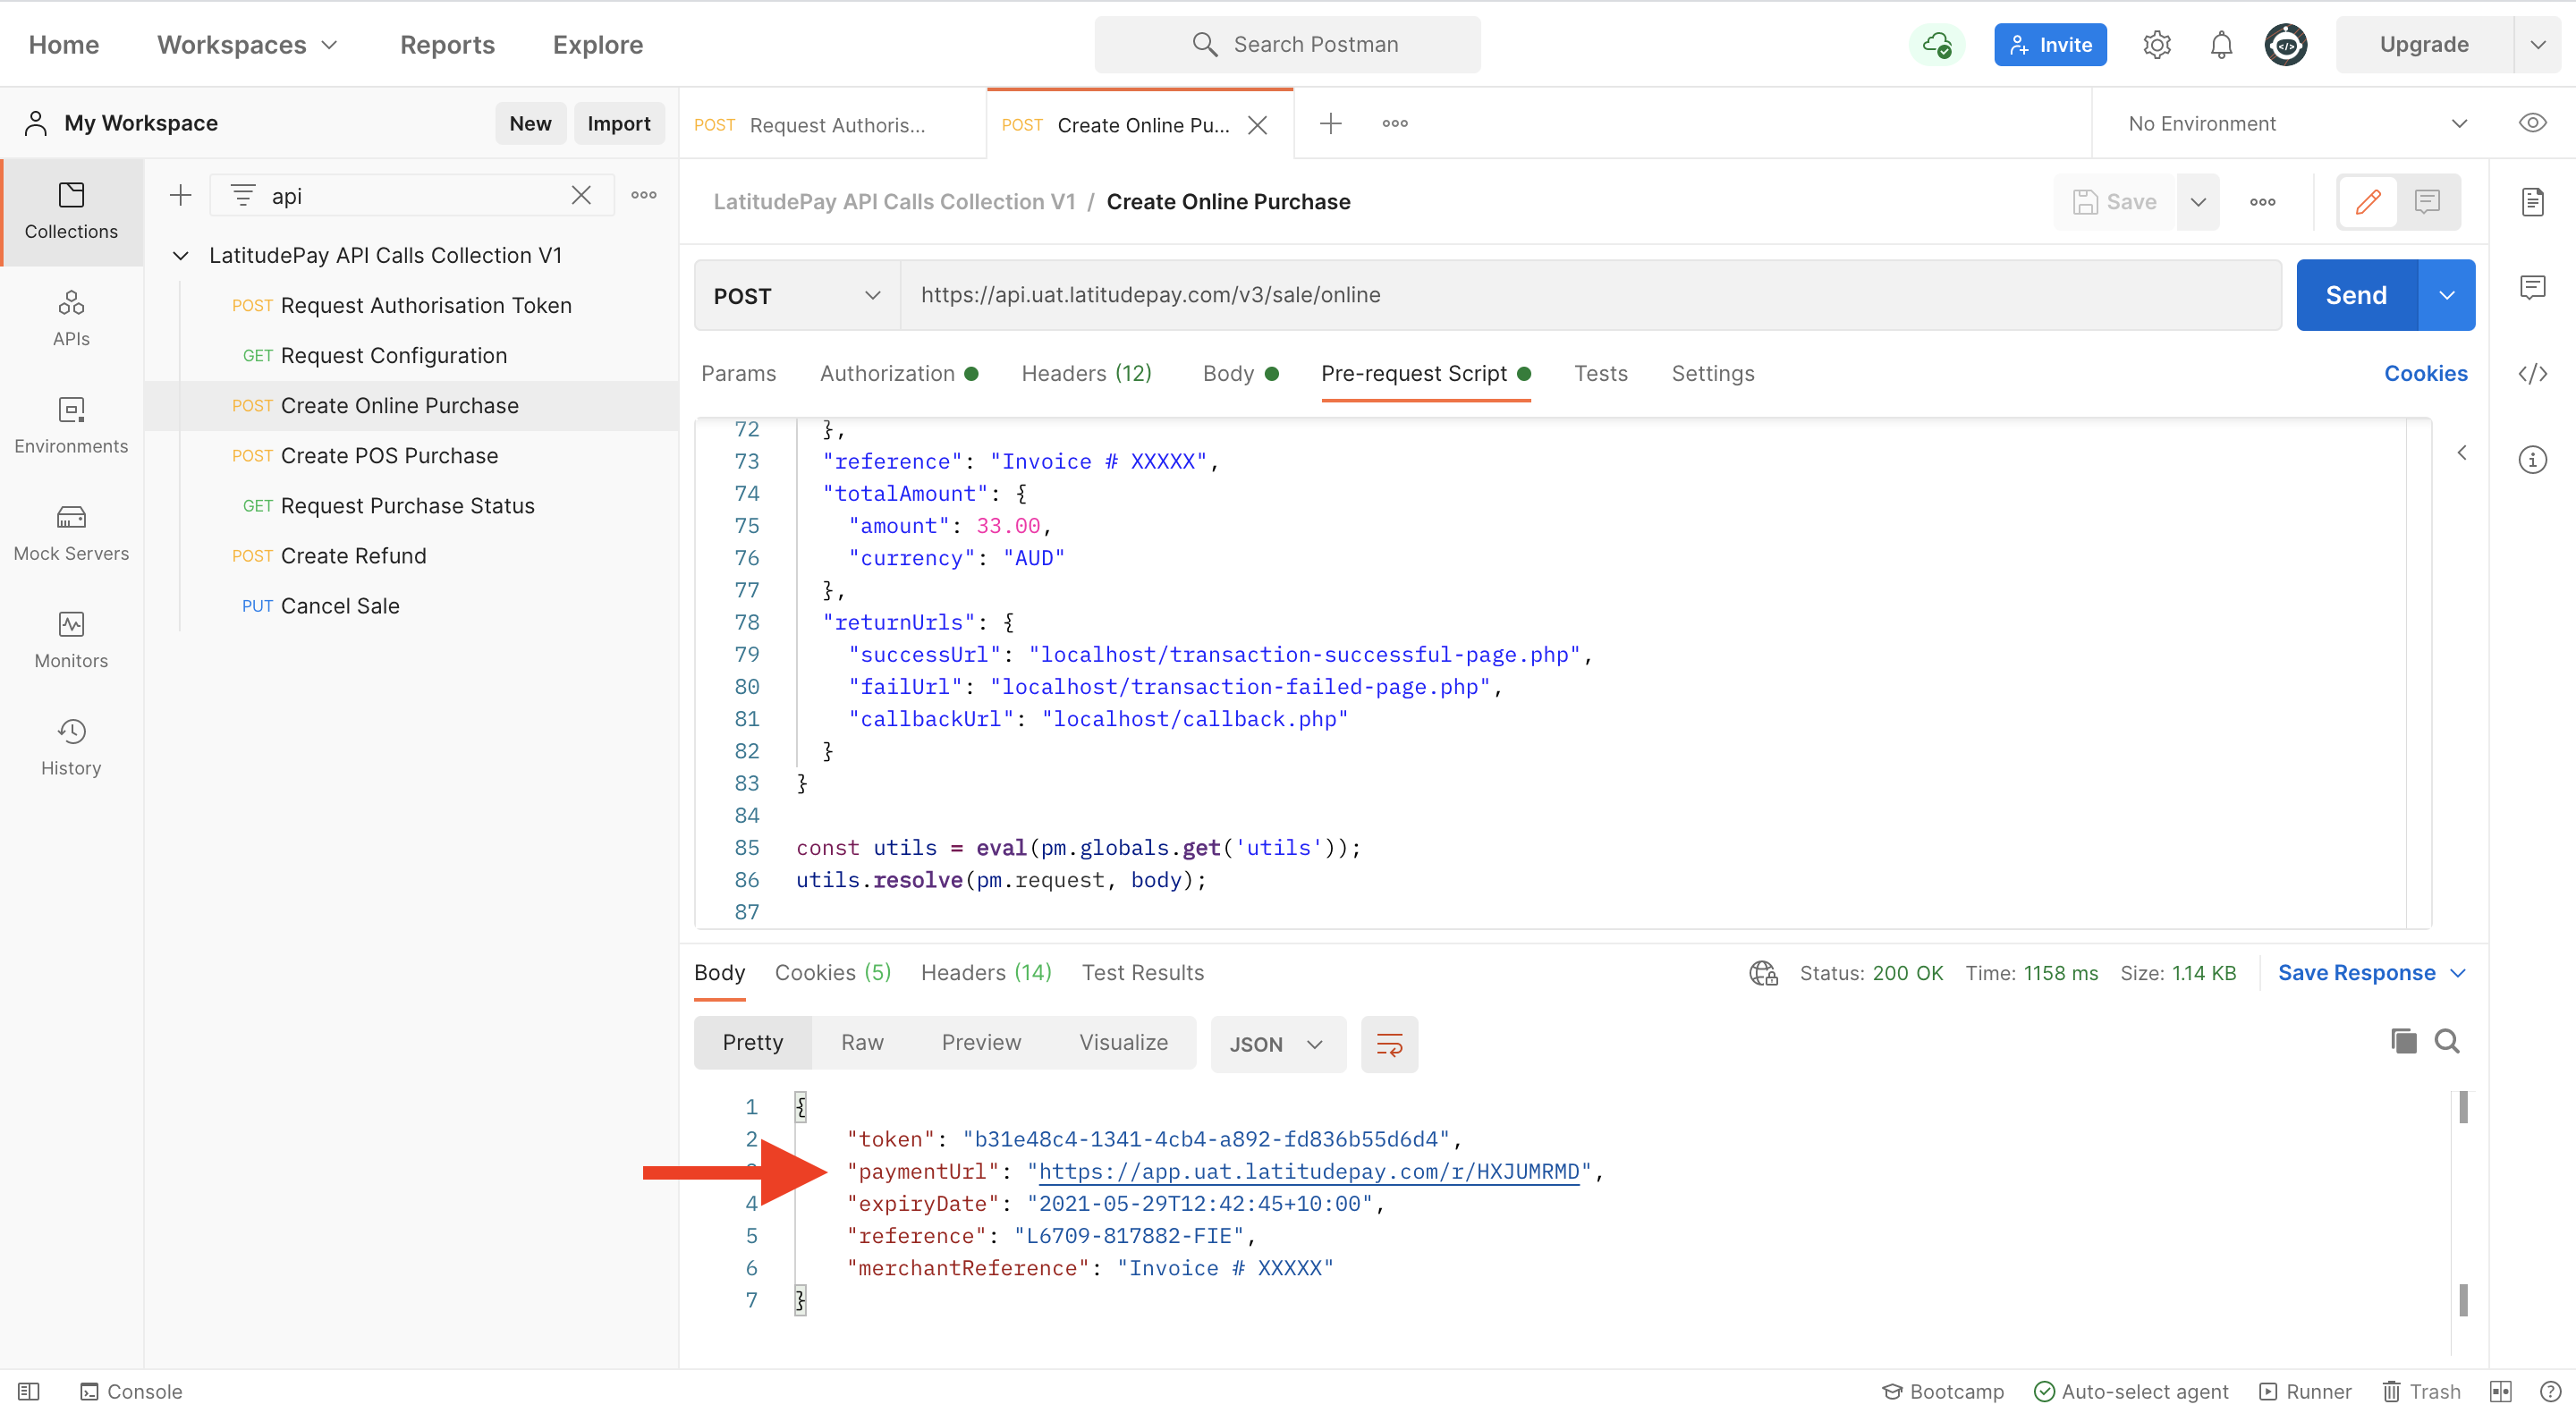
- Please retain, take note, and keep a copy of the token from the response
Create POS Purchase#
This end point creates a new POS purchase in the LatitudePay platform. The customer information provided is used to prepopulate the LatitudePay sign up process or identify an existing customer account.
The merchant system should retain the token provided in the purchase response, as this is required in the event that a refund is to be processed, and to poll for the purchase status.
Once the POS sale has been successfully created, the POS system must either await a callback (if a callback URL was provided) or can optionally poll for the status after a time out period. Polling should be limited to 1 poll per 5sec interval.
This request uses:
- Authorisation: Bearer Token
- Header: Accept, Content-Type, and X-Idempotency-Key
- Body: JSON containing purchase request
- You can use the same JSON body as the one in Create Online Purchase. In this sample however, shippingAddress, shippingLines, and returnUrls information are omitted to simulate real world situation. Please include this information whenever possible to match what’s already available in your POS system, e.g., inherited from customer membership.
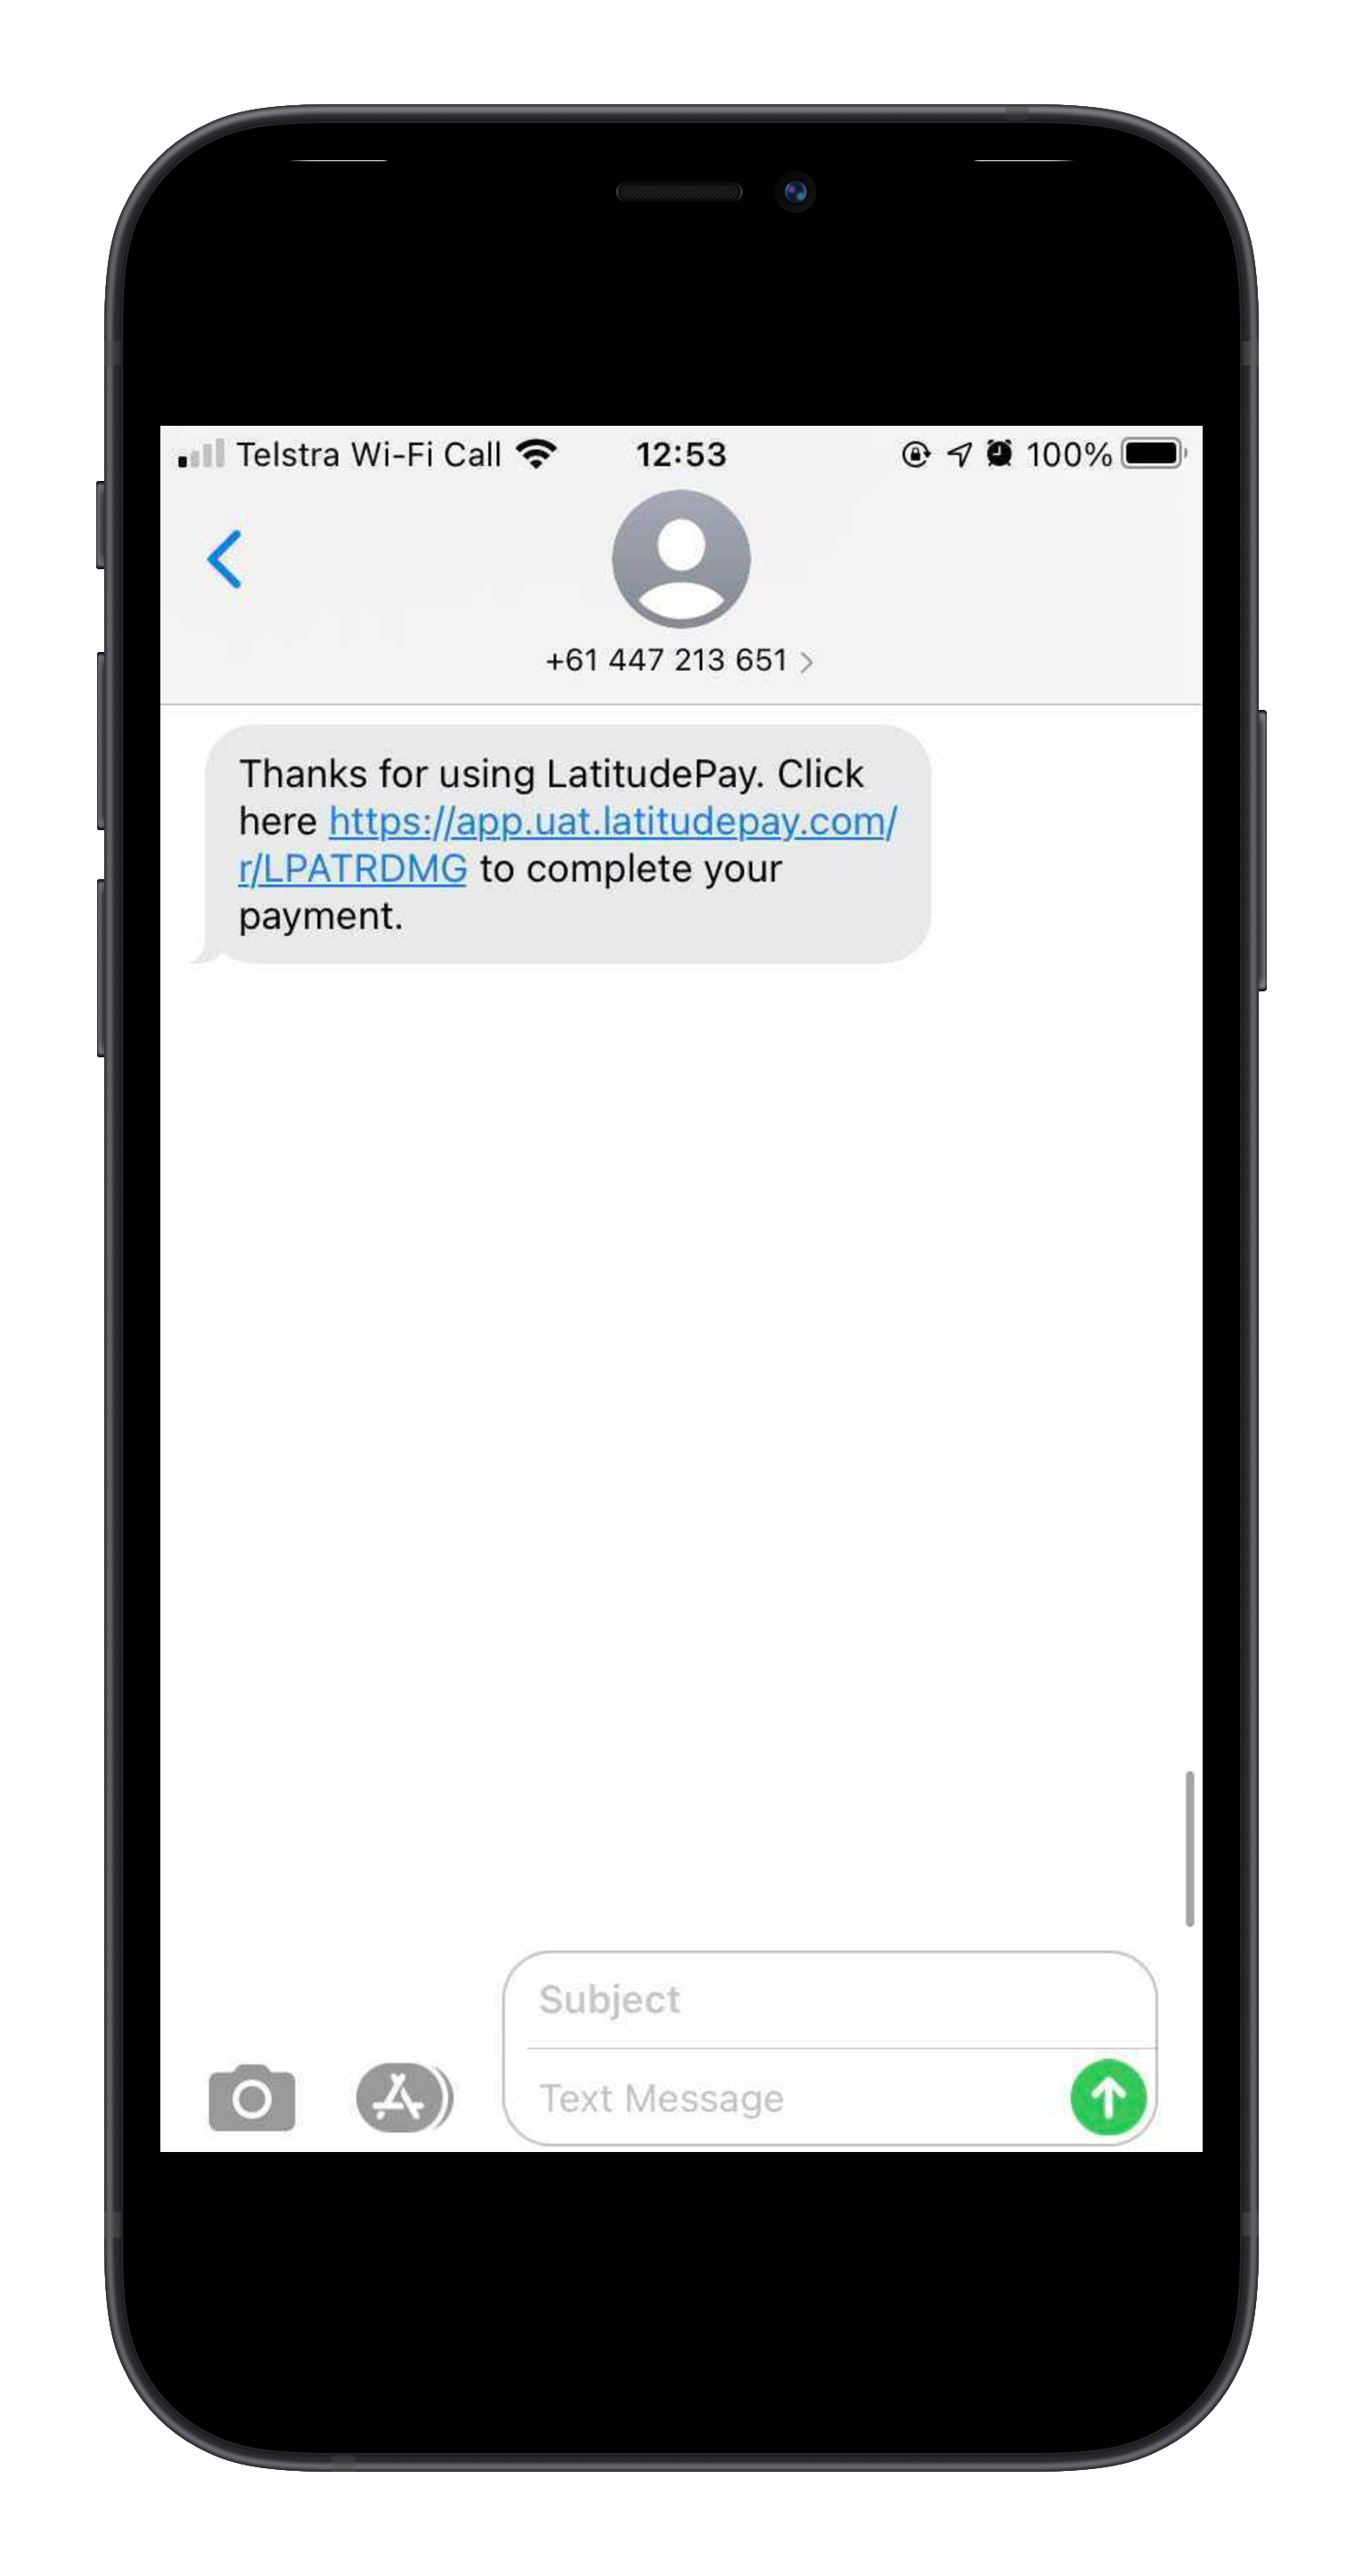
The most important information to be passed is mobileNumber. Please use a valid mobile number to receive a text message containing a payment link.
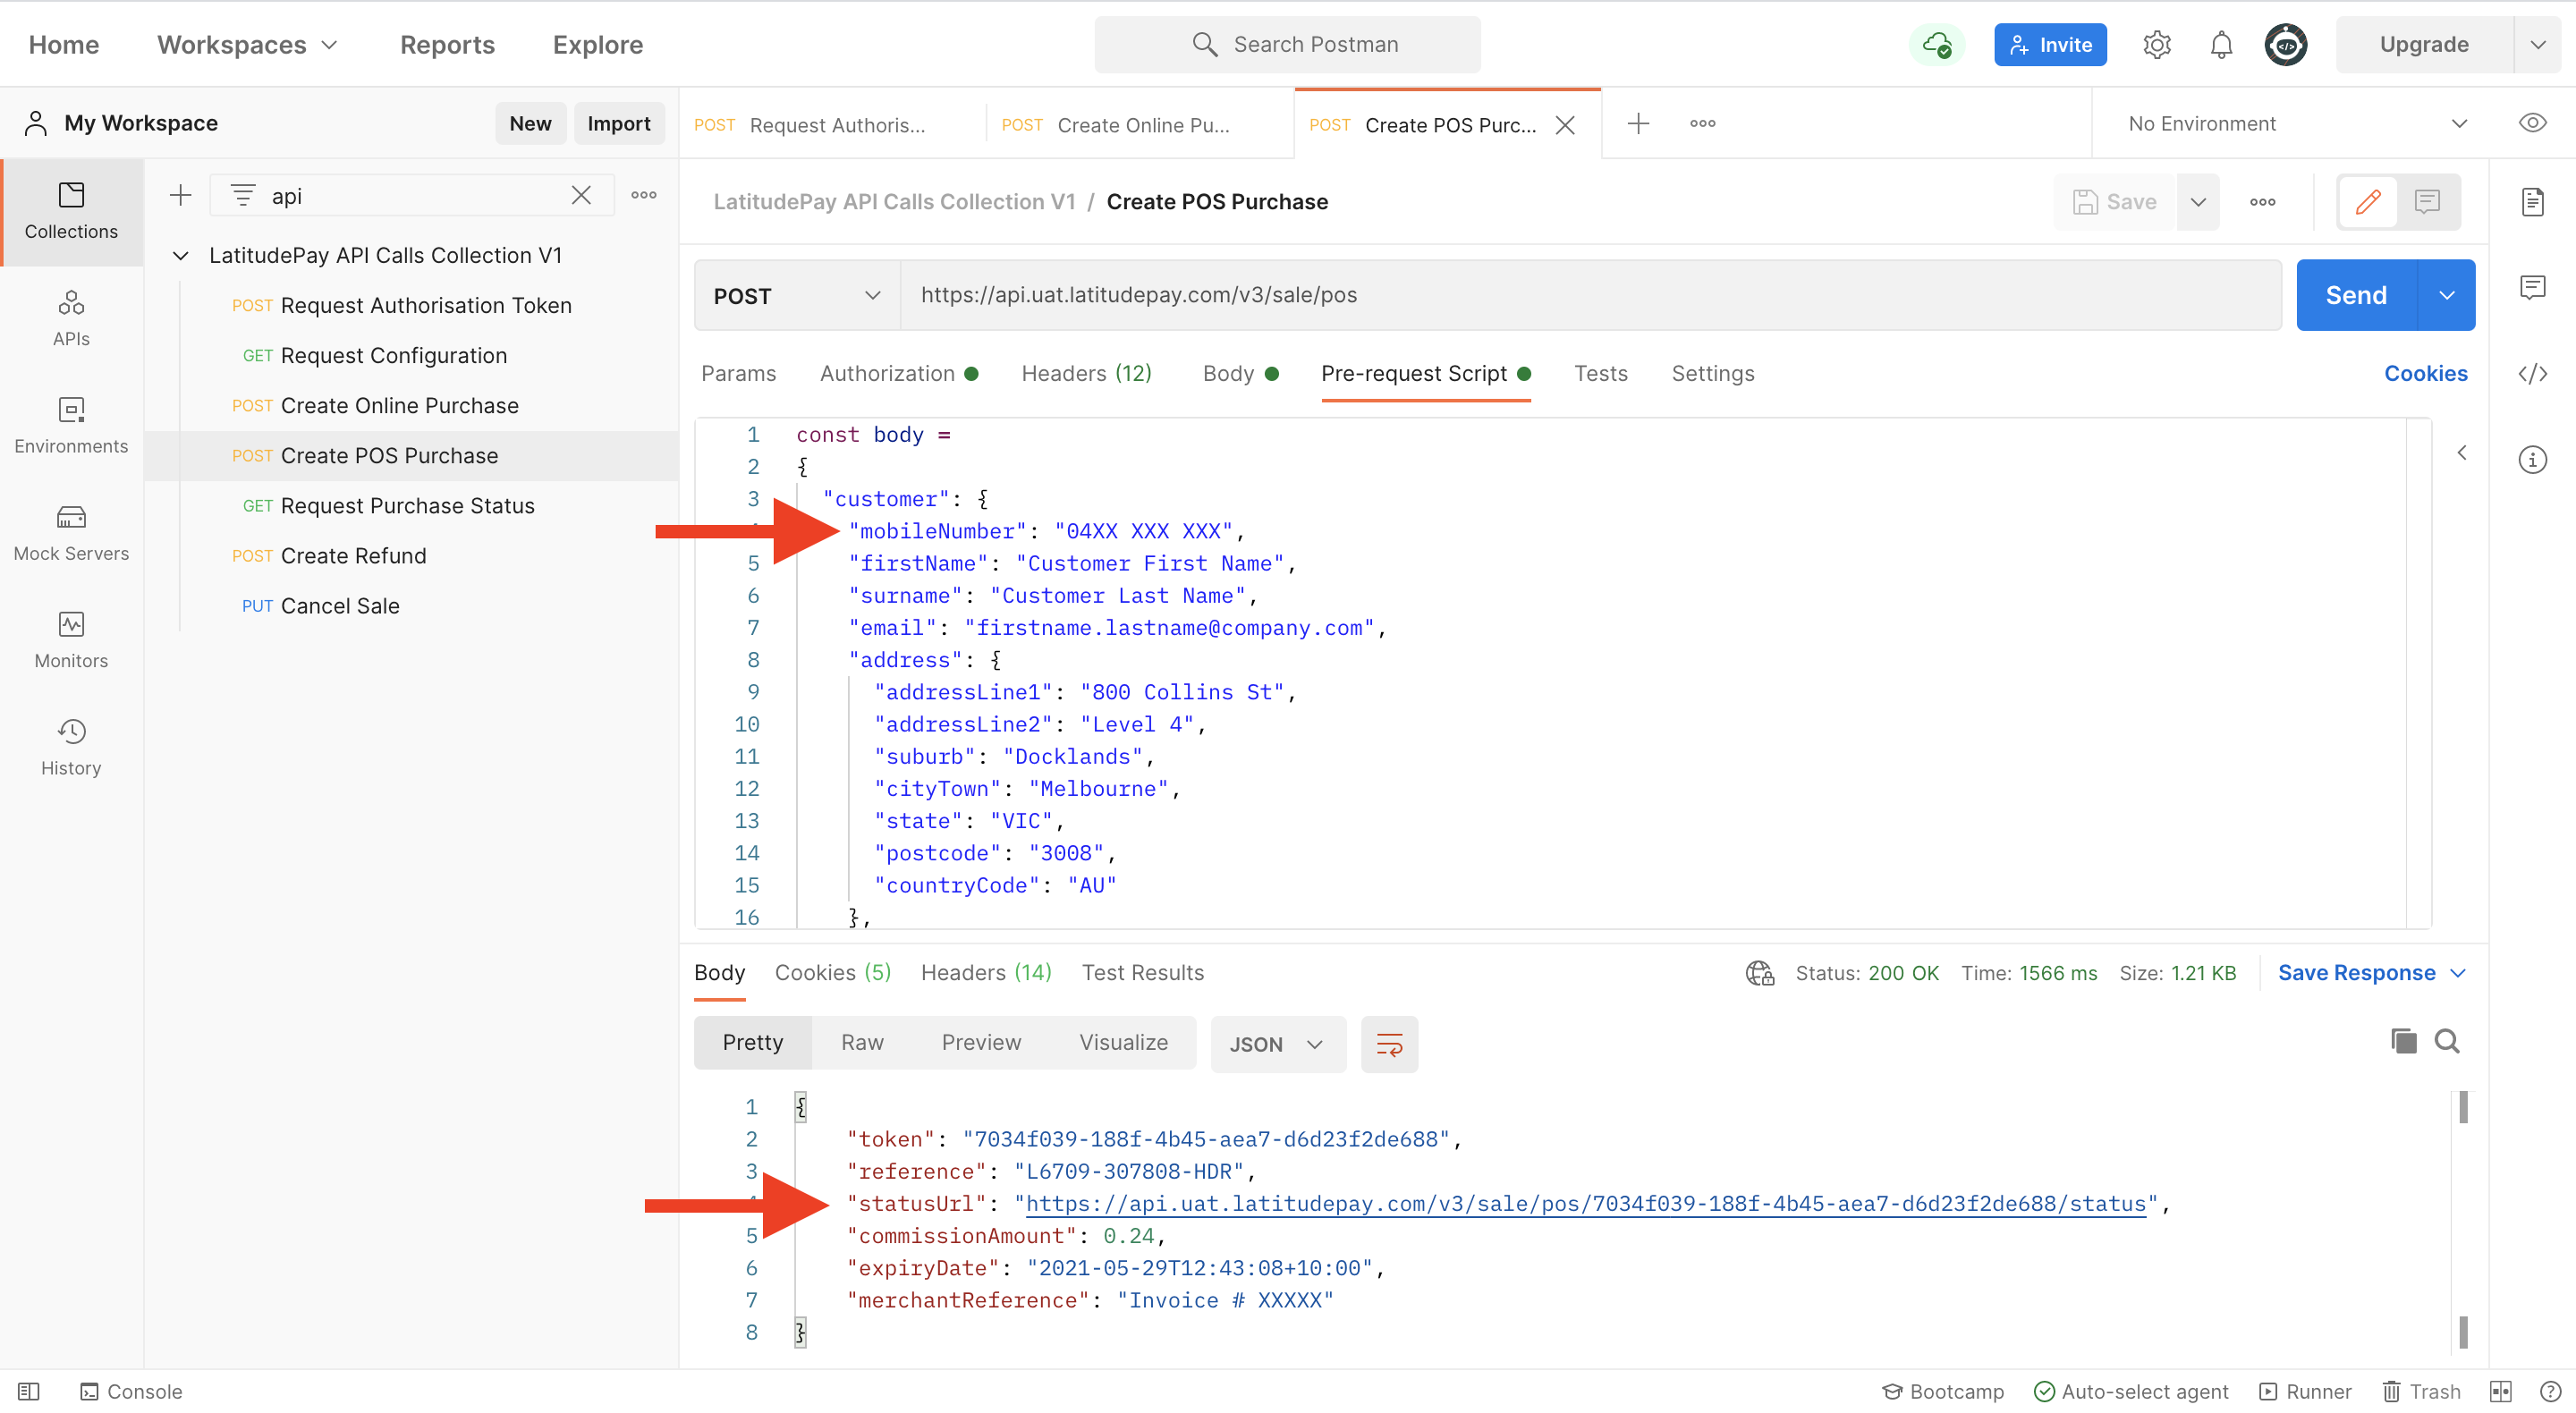
Please retain, take note, and keep a copy of the token from the response
The mobile number entered in the JSON body will receive a text message with a payment link
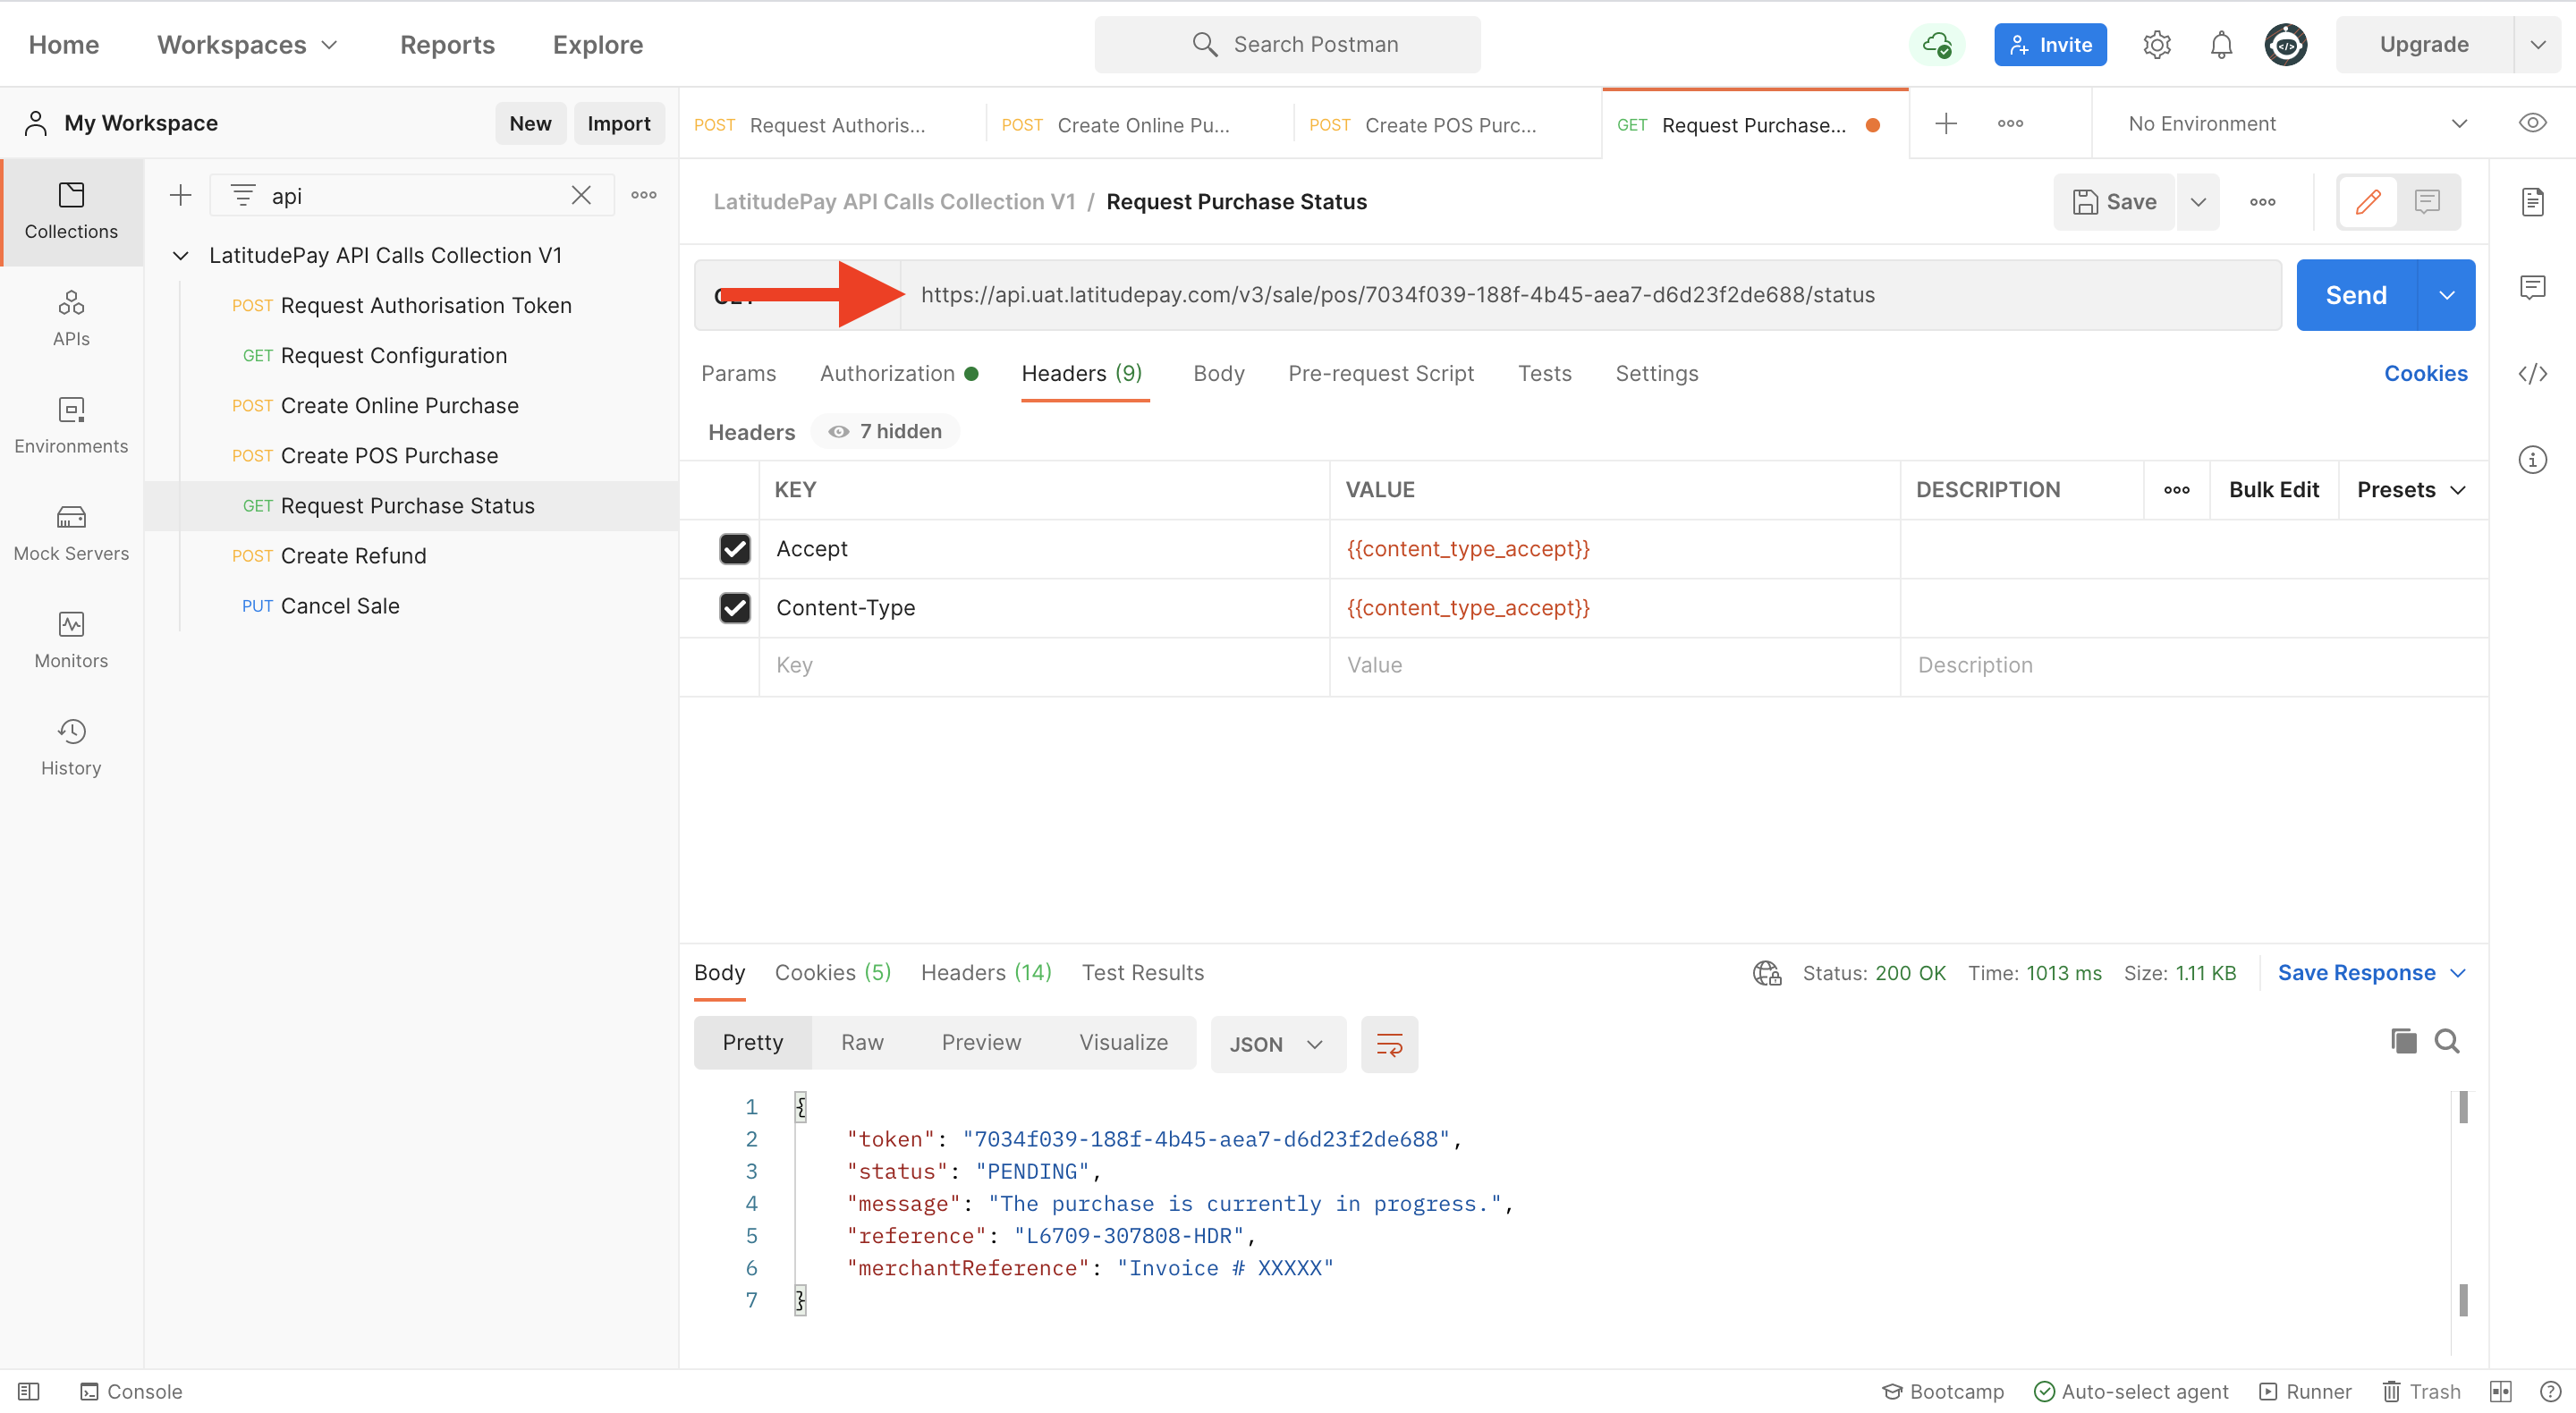
Request Purchase Status#
This end point returns the purchase status for the requested payment plan and should be used in conjunction with the /sale/pos endpoint.
This request uses:
- Authorisation: Bearer Token
- Header: Accept and Content-Type
- Edit the URL destination and paste the token retained from Online or POS purchase
/sale/pos/< ENTER PURCHASE TOKEN HERE >/status
Create Refund#
This end point performs a full or partial refund for an existing LatitudePay payment plan.
Upon success, the customer will be refunded any amount owed via their original nominated payment method.
With the V3.1 schema refunds are processed asynchronously. A response is immediately returned with a created refund request that is pending completion. This request will then be picked up and fulfilled later on.
This request uses:
- Authorisation: Bearer Token
- Header: Accept, Content-Type, and X-Idempotency-Key
- Body: JSON containing refund request
- Similar to Request Purchase Status, edit the URL destination and paste the token retained from Online or POS purchase
/sale/< ENTER PURCHASE TOKEN HERE >/refund
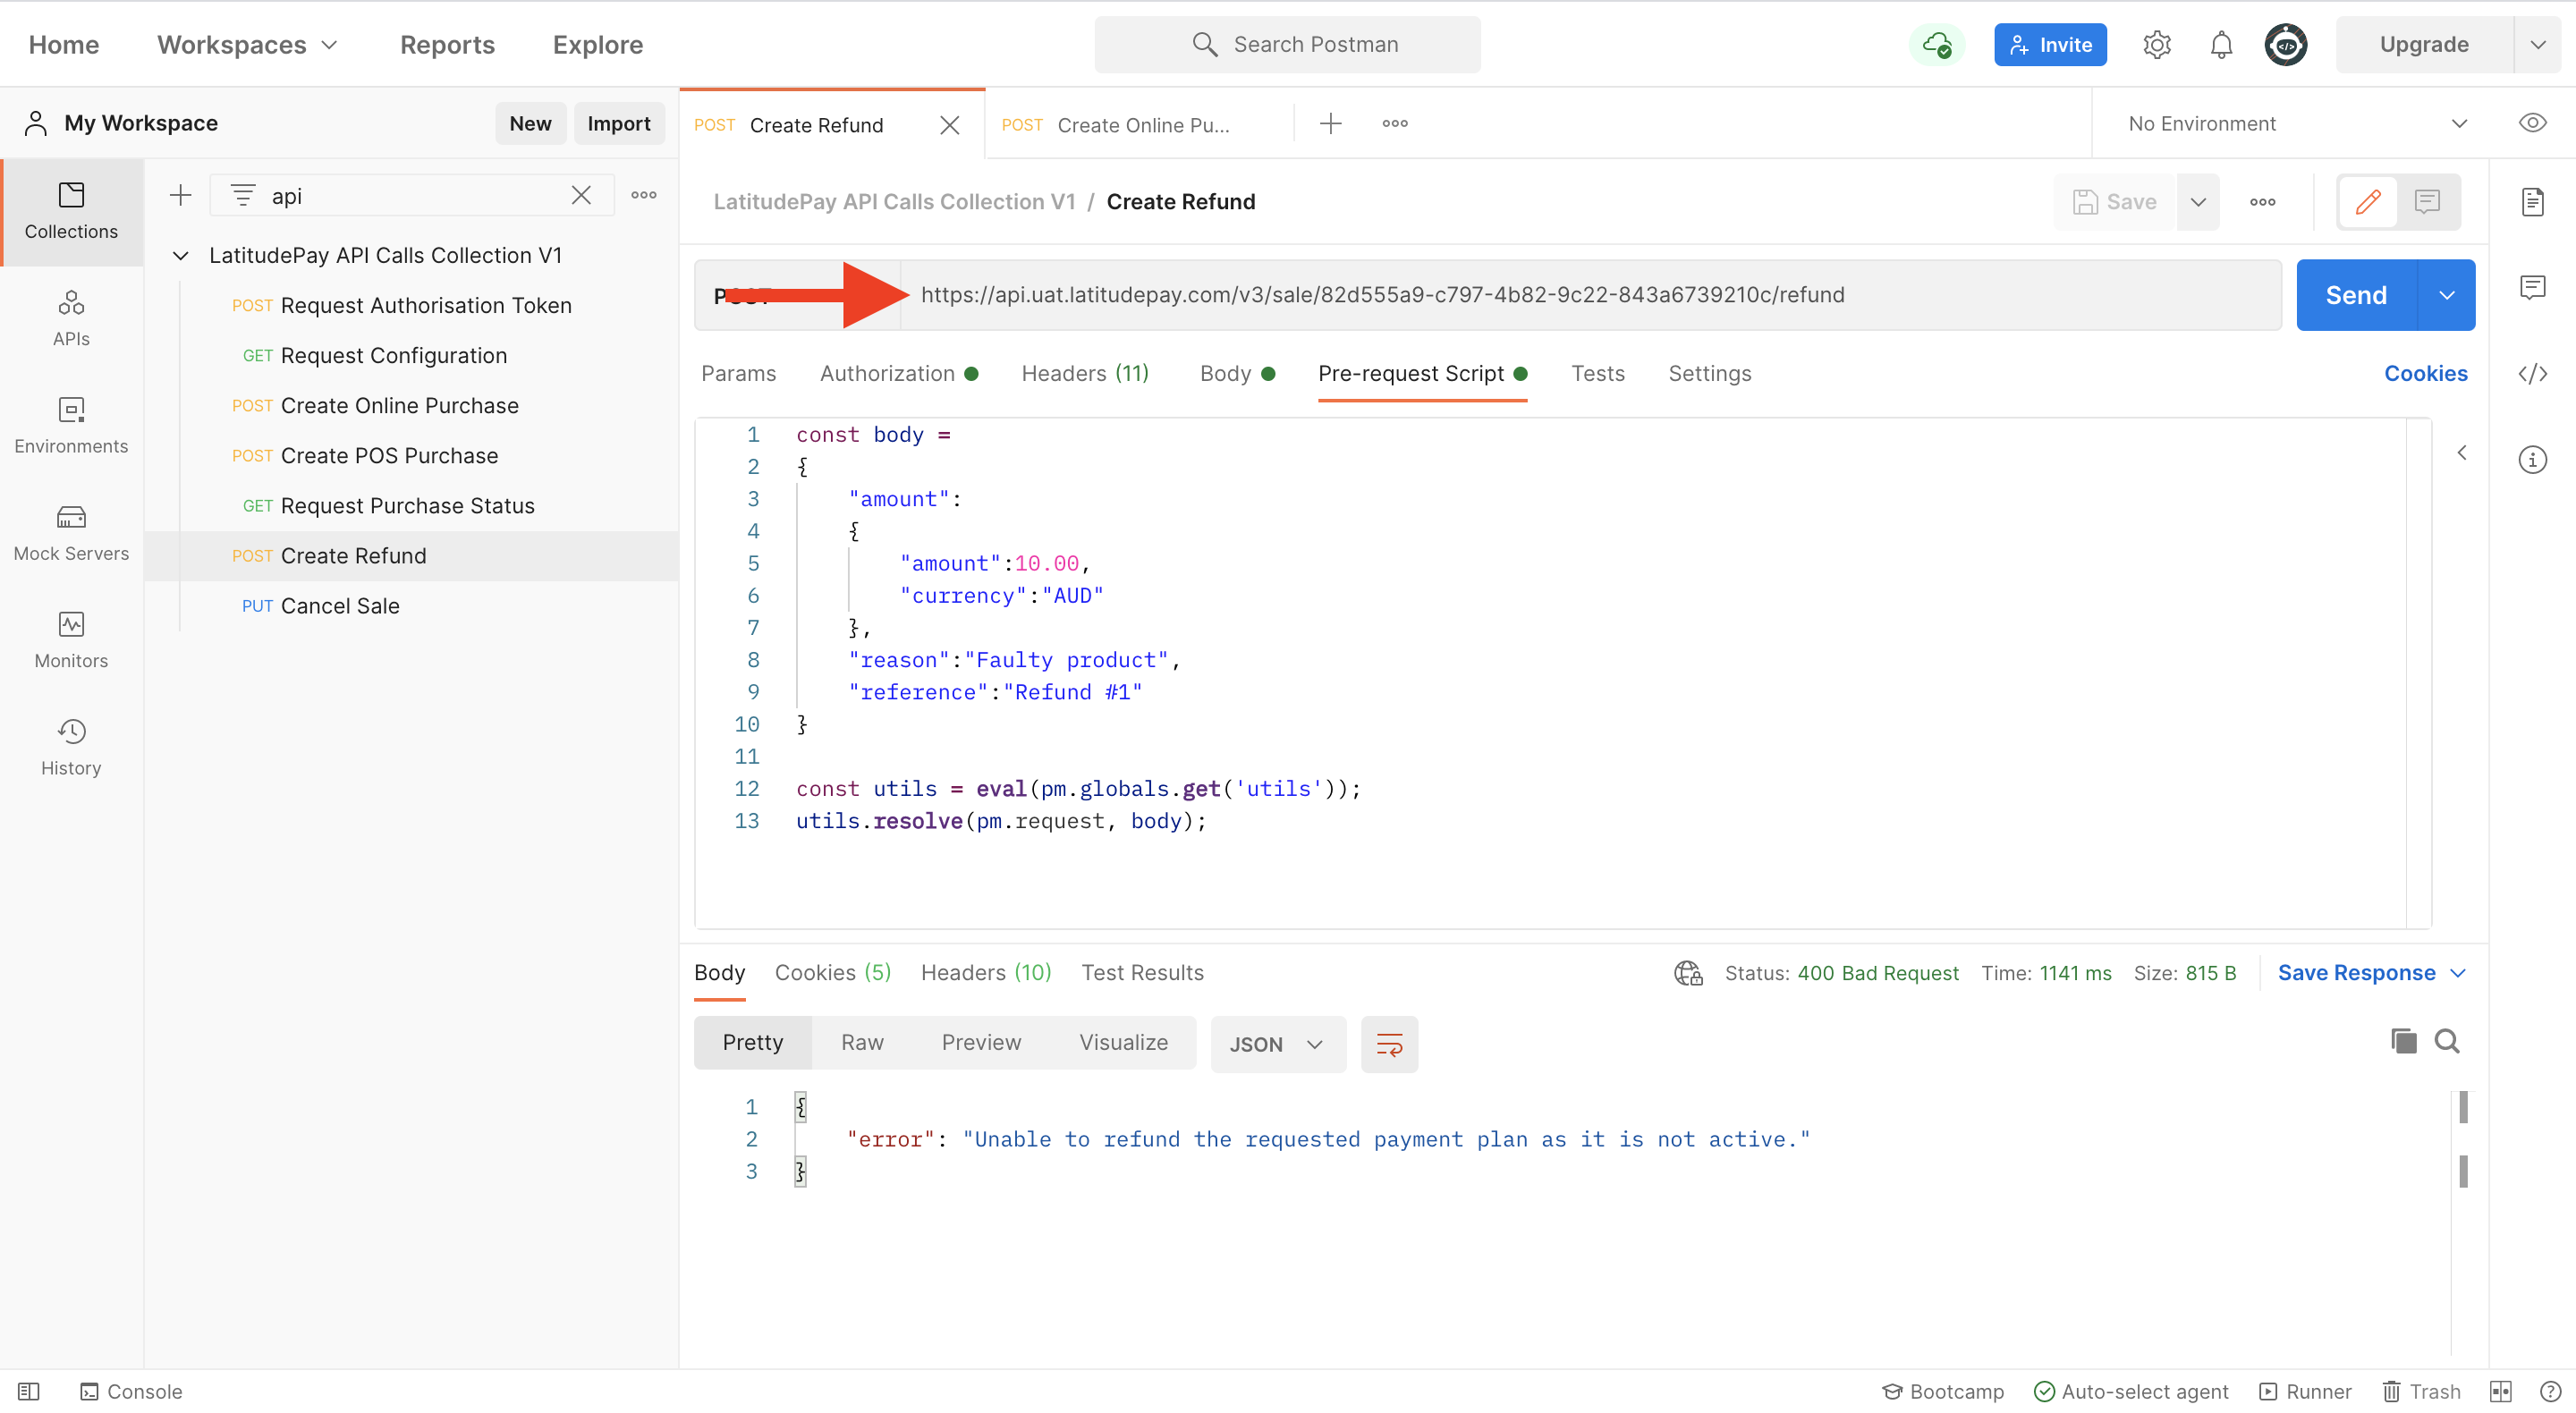
- A sample JSON has been provided under Pre-request Script
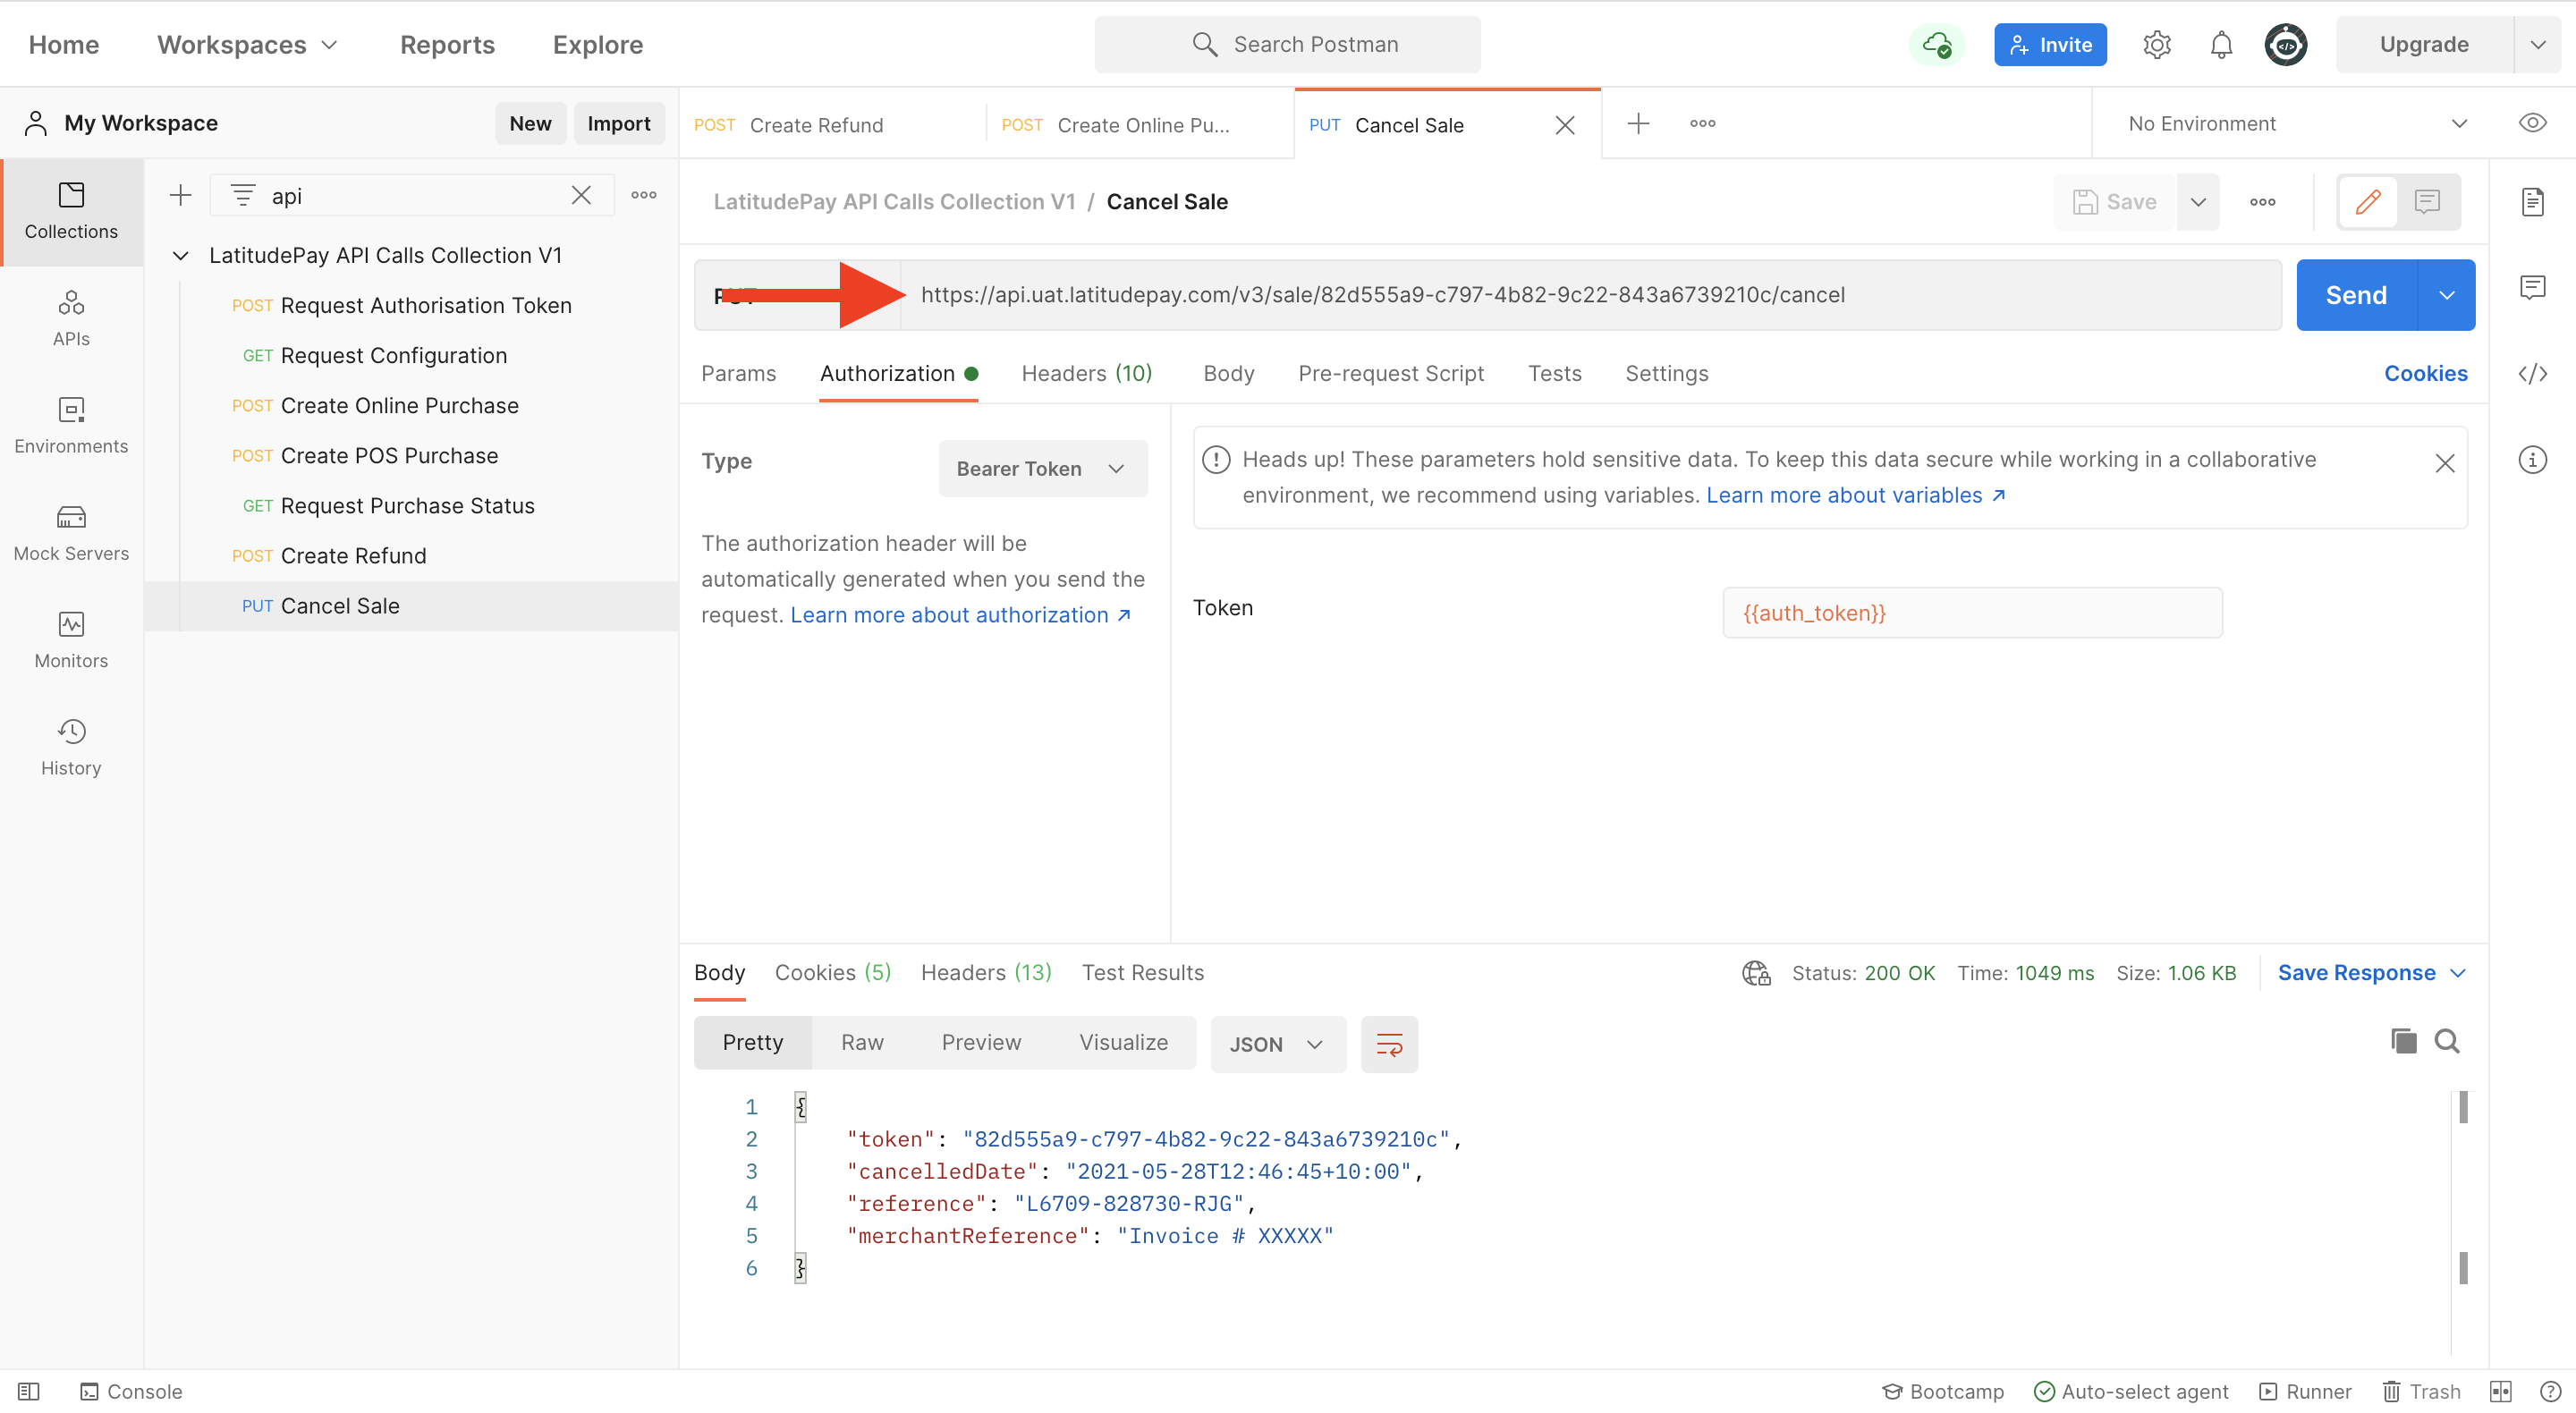
Cancel Sale#
This end point cancels an existing sale that has not yet been completed by the customer.
This request uses:
- Authorisation: Bearer Token
- Header: Accept and Content-Type
- Edit the URL destination and paste the token retained from Online or POS purchase
/sale/< ENTER PURCHASE TOKEN HERE >/cancel
Known Issue(s)#
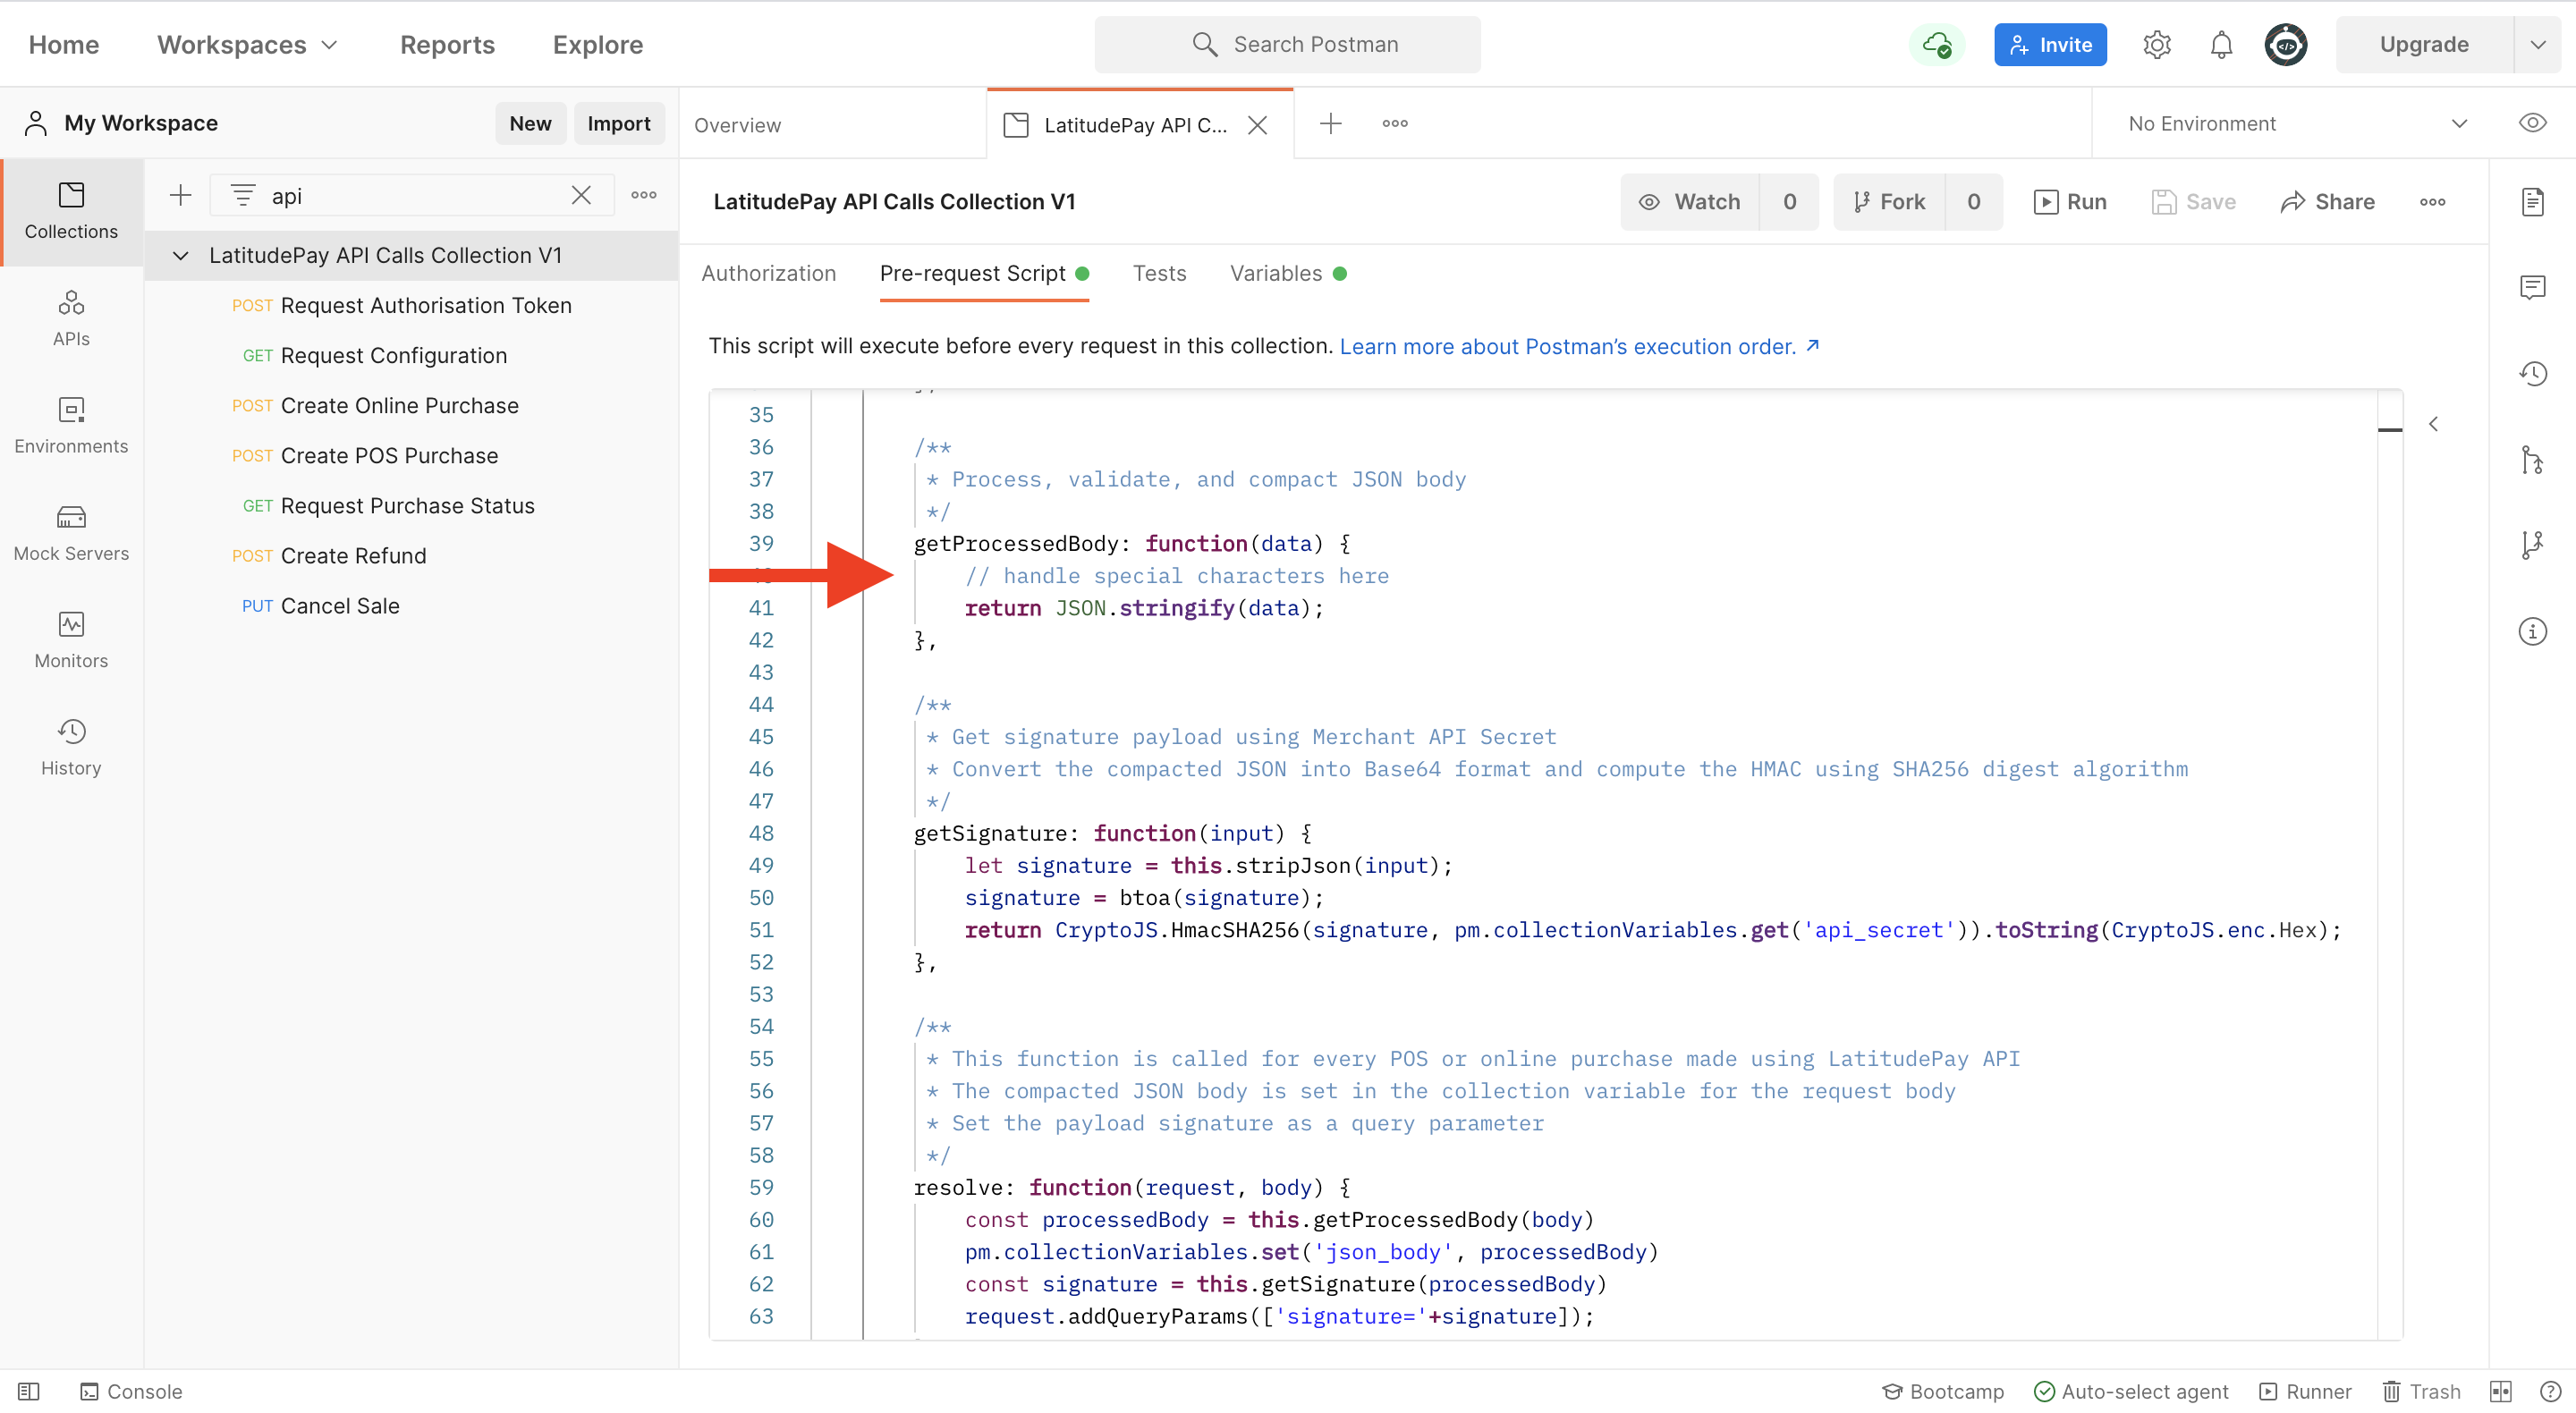
If the product name in the JSON body contains special characters such as letters with diacritics, ligatures, or digraphs, the signature generated will not match the signature generated on the server, therefore failing the transaction.
This can easily be handled using built-in functions in PHP: json_encode() or htmlspecialchars().
The product name in the JSON body to be used for signature generation must be HTML encoded so that it appears correctly on the Merchant Portal and the Client Portal.
Example: L'Oréal èspánol ørig Paris Face Mask
| VALID | JSON Encode PHP | "L'Or\u00e9al \u00e8sp\u00e1nol \u00f8rig Paris Face Mask" |
If you would like to create a new function to manually handle these characters on Postman, you can do so in the Pre-request Script on the collection itself: