EPiServer Integration
What is EPiServer LatitudePay Payment Provider?#
The LatitudePay payment provider consists of 3 NuGet packages.
EPiServer.Business.Commerce.Payment.Genoapay.CommerceManager- This package contains .ascx user control for payment method configuration in Commerce Manager.EPiServer.Business.Commerce.Payment.Genoapay.SDK- This package is the main library that contains LatitudePay payment gateway implementation, extensions and utilities that helps to simplify the integration between Episerver Commerce and LatitudePay.EPiServer.Business.Commerce.Payment.Genoapay.Quicksilver- This package contains an example in implement LatitudePay integration example in Quicksilver project.NOTE: This package is for demonstrate the entire checkout and payment workflow within Quicksilver solution and it is not mandatory for your custom solution.
Payment flow#
LatitudePay payment flow uses the redirect model. During the checkout, customer will be redirected from your eCommerce website to LatitudePay pages. LatitudePay will collect the customers payment information before redirecting the customer back to your eCommerce website.
Customer visits checkout page and LatitudePay payment option is displayed.
Customer chooses LatitudePay option and presses the checkout button.
Customer is redirected to LatitudePay to complete the payment.
Customer completes the payment steps in the LatitudePay pages.
Customer is redirected back to Episerver site with either a success or fail response.
- For success payment response - Episerver creates purchase order and retains the token as this is required in the event that a refund is to be processed.
- For fail response - Episerver displays error details.
Quicksilver demo site implementation#
To quickly understand how this payment provider works, you can follow the Quicksilver setup guide to install EPiServer.Business.Commerce.Payment.Genoapay.Quicksilver package in Quicksilver site which contains an example implementation to illustrate the payment flow
References#
Installation and configuration instructions (Quicksilver example)#
- Step 0 - Prerequisites
- Step 1 - Set up Quicksilver site locally
- Step 2 - Install NuGet packages
- Step 3 - Set up LatitudePay payment provider in Commerce Manager
Step 0 - Prerequisites#
- .NET Framework 4.6.1 or higher
- Episerver Commerce 12 or higher
Step 1 - Set up Quicksilver site locally#
- Clone Quicksilver source code from here and follow instructions to setup the site.
Step 2 - Install NuGet packages#
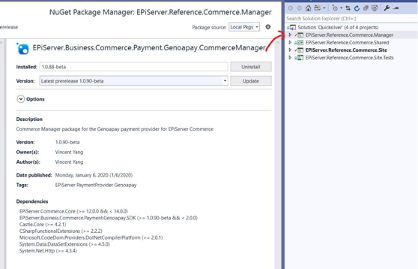
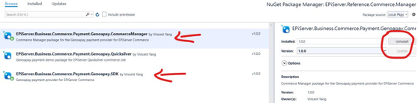
Install the latest
"EPiServer.Business.Commerce.Payment.Genoapay.CommerceManager"package into Commerce manager back-end site. (EPiServer.Reference.Commerce.Manager)
Install-PackageEPiServer.Business.Commerce.Payment.Genoapay.CommerceM
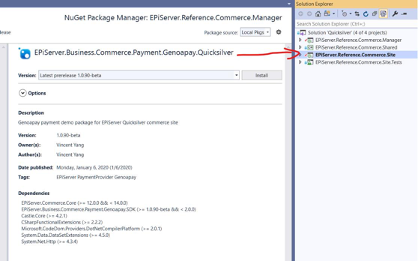
Install the latest
"EPiServer.Business.Commerce.Payment.Genoapay.Quicksilver"package into your Merchant front-end site. (EPiServer.Reference.Commerce.Site)
Install-PackageEPiServer.Business.Commerce.Payment.Genoapay.Quicks
Build the entire solution and make sure build is succeed.
Step 3 - Set up LatitudePay payment provider in Commerce Manager#
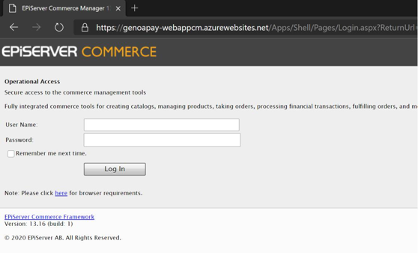
After completing the package installation, open the Episerver Commerce Manager back-end site.
Then, follow these steps.
Log in to Commerce Manager and proceed to Administration > Order System > Payments > English. The last option is the language in which you want to make the payment available.
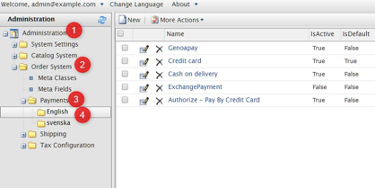
Click New button to create new payment method with the following details:
- For System keyword, enter Genoapay
- For Language, select English
- For Class Name, select
EPiServer.Business.Commerce.Payment.Genoapay.SDK.GenoapayPaymentGate way - For Payment Class, select Mediachase.Commerce.Orders.OtherPayment
- Set IsActive to Yes
- Add all available shipping methods
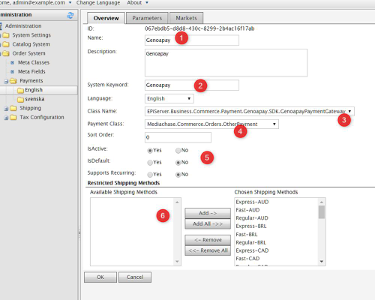
Click OK to save the LatitudePay payment method.
Open the LatitudePay payment method and proceed to the Parameters tab. This will allow you to complete additional mandatory parameters.
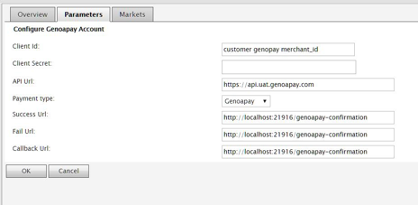
Parameter details#
| Parameter Name | Parameter Description |
|---|---|
| Client ID | The merchant_id that can be obtained from merchant LatitudePay account. |
| Client Secret | The merchant_secret that can be obtained from merchant LatitudePay account area.* API URL - The environment URL to process a LatitudePay payment. LatitudePay provides two environments Sandbox and Production. |
| API URL | The environment URL to process a LatitudePay payment. LatitudePay provides two environments - Sandbox and Production. |
| Payment Type | The payment type option. The default value is Genoapay which can be used for New Zealand currency. It also supports LatitudePay for Australian currency. |
| Success URL | The payment type option. The default value is Genoapay which can be used for New Zealand currency. It also supports LatitudePay for Australian currency. |
| Fail URL | The merchant site URL user will be redirected to when payment is fail. |
| Callback URL | (TBD) The merchant site URL asynchronous post request is made by LatitudePay. This ensures the orders are completed. |
Proceed to the Markets tab and add the expected markets for this payment.
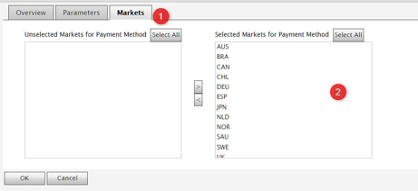
Click OK to save all changes.
Uninstallation (Quicksilver example)#
Step 1 - Remove packages#
Uninstall
EPiServer.Business.Commerce.Payment.Genoapay.Quicksilver and EPiServer.Business.Commerce.Payment.Genoapay.SDKpackages from Quicksilver project.

UninstallEPiServer.Business.Commerce.Payment.Genoapay.CommerceManager and EPiServer.Business.Commerce.Payment.Genoapay.SDKpackages from CommerceManager project.
Clean and rebuild the solution, make sure there is no
EPiServer.Business.Commerce.Payment.Genoapayrelevant dlls from bin folder in both Quicksilver and CommerceManager site.
Step 2 - Remove registered payment#
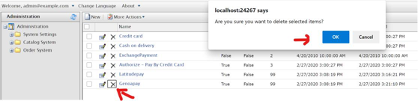
- Open Commerce Manager, proceed to Administration > Order System > Payments > English, remove LatitudePay payment.
EPiServer Refund#
- Step 1 - Open Commerce Manager
- Step 2 - Release the shipment
- Step 3 - Create shipping and pack lists
- Step 4 - Complete shipment
- Step 5 - Create return
- Step 6 - Verification
Step 1 - Open Commerce Manager#
- Log in to Commerce Manager
Step 2 - Release the shipment#
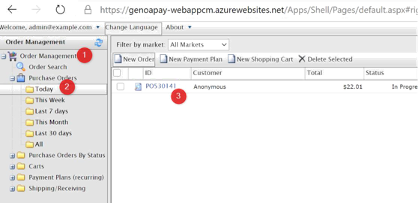
Proceed to Order Management > Purchase Orders >Today from left pane, find your order and open in details form.
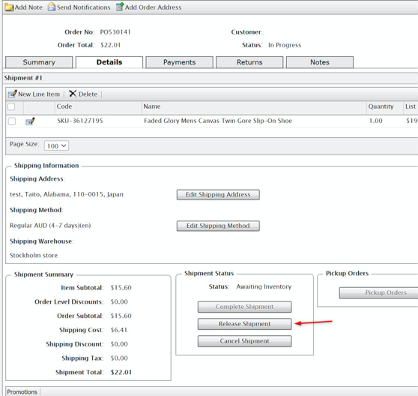
Proceed to Details tab, click Release Shipment.
Step 3 - Create shipping and pack lists#
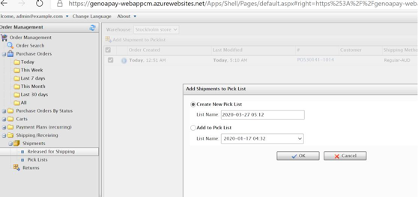
Proceed to Order Management > Shipping/Receiving > Shipments > Released for Shipping from left pane. Select Stockholm store from warehouse dropdown list (2) and add the shipment to picklist (3,4).

Create a new picklist with default list name.
Step 4 - Complete shipment#
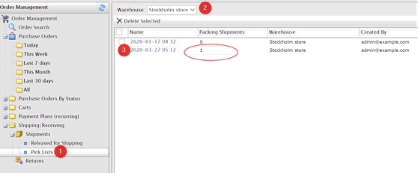
Proceed to Order Management > Shipping/Receiving > Shipments > Pick Lists from left pane. Select Stockholm store from warehouse dropdown list (2) and open the packing list which has more than 1 packing shipments available (3).
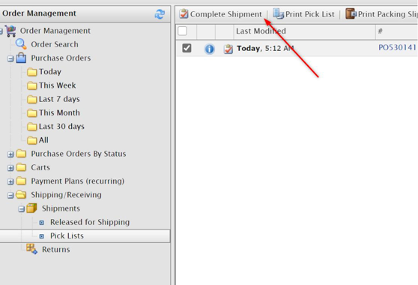
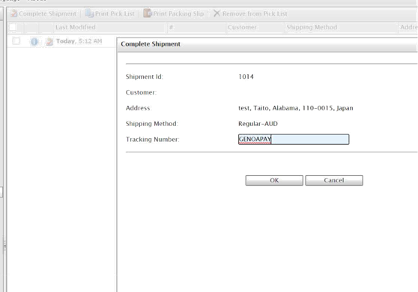
On packing list details page, select the order and click Complete Shipment button, you will be required to provide tracking number to mark shipment as complete.
Step 5 - Create return#
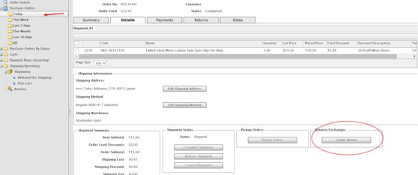
Proceed to Order Management > Purchase Orders >Today from left pane, find your order and open in details form. Proceed to Details tab, click Create Return button.
Add order items to and comments for current return.
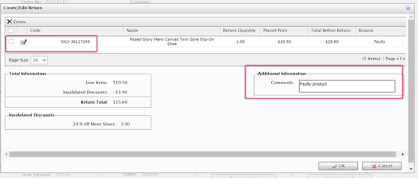
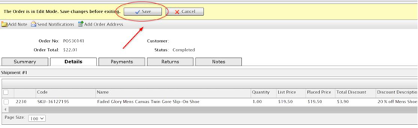
Save the return detail form changes.
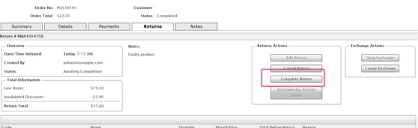
Open Returns tab and click Acknowledge Receipt Items.
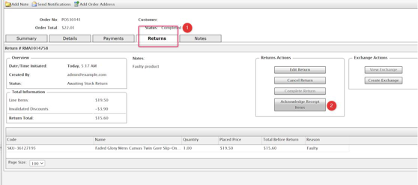
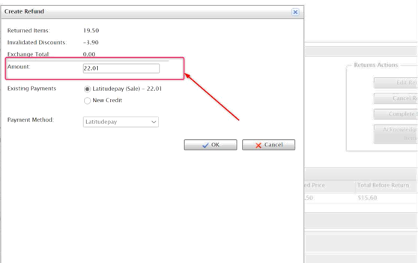
Once return items are acknowledged, click Complete Return button and fill the payment refund details.
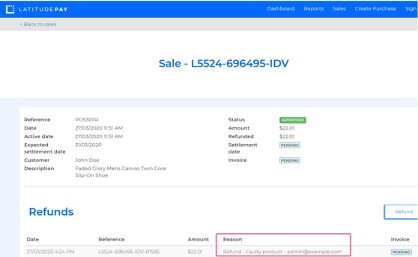
Step 6 - Verification#
Log in to LatitudePay as Merchant, proceed to the Sales screen, you'll be able to see the transaction has been refund with the reason.